

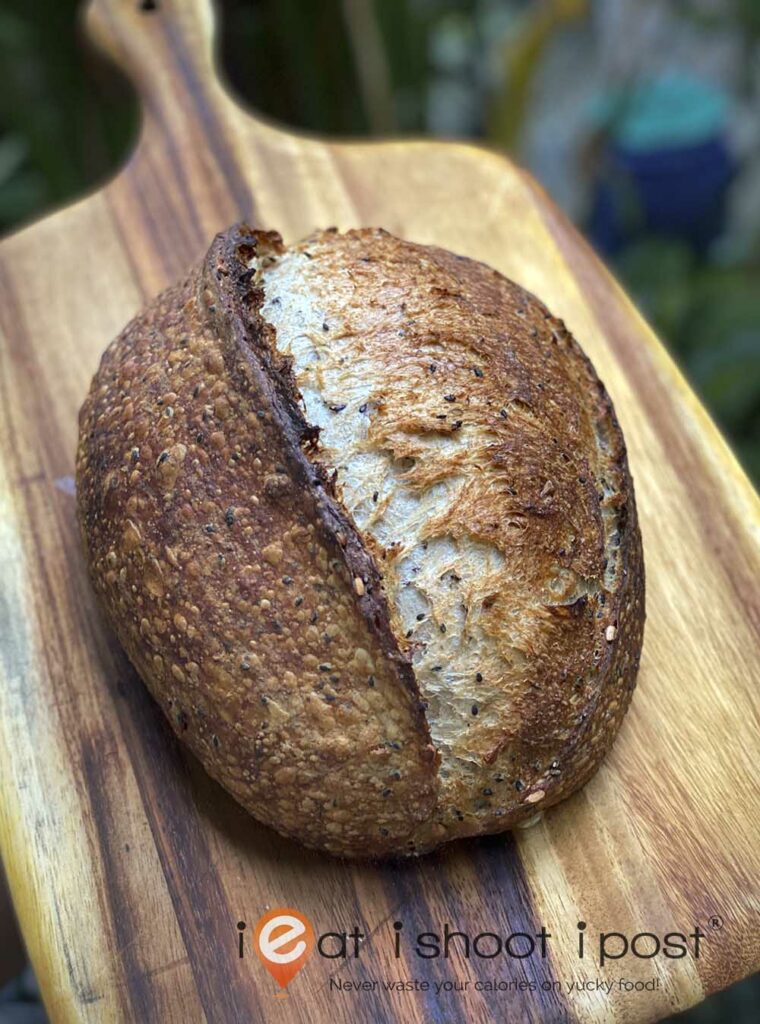
The Journey of a Thousand loaves….
If you are planning to start baking sourdough bread, then heed this warning first!
The journey of a thousand loaves begins with a starter.
I have written many other detailed recipes so that you will be able to succeed if you follow all my instructions closely. But, when it comes to sourdough bread, I have to tell you that you will not succeed with your very first loaf. So, if you are going to embark on this journey, be prepared to buy many many bags of flour.
On the positive side, sourdough bread is something that you can eat regularly and in my family, we hardly buy sliced bread anymore. Once you get used to flavourful bread that is healthier to boot, it is hard to go back to the commercial variety. So, even though I have had many loaves which didn’t get that perfect oven spring, they were still lovely to eat and my family and colleagues have enjoyed them immensely.
There is a ton of resources on the internet on how to bake the perfect sourdough loaf so I am not here to repeat what others have already done. In this post, I will distill everything I have learned (I must have spent hundreds of hours on youtube) into a concise recipe that I hope will help you cut down the number of attempts you need to get to the perfect loaf. This recipe is localized to the Singapore context where the average temperature in the kitchen is 26°C-30°C and I am using ingredients that are easily available locally.
Why is this a Journey and not just a Trip
Unlike many other recipes, baking sourdough bread is challenging because it is quite unpredictable. One day, you might bake the perfect loaf and the next day it might turn out to be a flop. Of course, over time, things get more consistent, but it takes a while to acquire the expertise to know how to read the state of your dough for the day. It is this unpredictable nature of sourdough that makes it so addictive. Just like fishing or golf, you are never guaranteed success every time you go out on a trip and it is on those trips where you fail that makes you plan for the next one with a new strategy to try.
My Dear Betty
After a seven-day gestation, my dear Betty was born on 17 May 2022. She is a product of flour, water, microbes, and time and she is unique to my kitchen. My starter will be different from yours and she continues to change every day. One day, she may be more yeasty, the next day she may be more acidic. One day, she’s more active, the next day she might take longer to rouse. The journey to mastering Sourdough bread (I am no master yet) starts with understanding that your sourdough starter is unique and you will need time and repeated attempts at making sourdough bread in order to understand its pattern of behavior.
The Point of No Return
In this recipe, I will assume that you already have a starter to work with. If not, you can try to get some from a friend or make your own with the help of this video. (This is the one that got me started)
Ready to make some sourdough bread?
Ingredients
Levain
20g Mother Starter
20g Organic wholewheat flour
20g Dark Rye flour
40g Water
Dough
Levain 80g
Cold Water 330ml
Salt 2 tsp
Wholewheat flour 50g
Unbleached Bread Flour 380g
Optional
Mixed Seeds (Sesame, Sunflower, Pumpkin) 60g
Sugar 1 Tbsp
Instant Yeast 1/8 tsp
Vital Wheat Gluten 1 Tbsp
Banneton Size: 30cm x 14cm
Dutch Oven Size: 35cm x 25cm
My Schedule
7am: Mix ingredients for Levain and leave on counter to rise
12pm: Mix ingredients for main dough
12.30pm: – 5.30pm: Series of stretch and folds
5.30pm: Pre-shape
6.00pm:ice Shape into Batard and place in Banneton
6.30pm: Place banneton in fridge
Next day 7am: Place dutch oven in oven
7.30am: Bake bread
8.10am: Sourdough Loaf is ready!
Baking Method
Preheat Dutch oven 225°C for 30mins.
Place bread in the Dutch oven and bake for 20mins
Remove the top cover/lid and lower the temperature to 200°C
Bake for 15mins or until golden brown
Allow to cool completely before slicing
Serving Tip
In our humid weather, the crust becomes soft quickly. The best way is to bake the whole loaf in a 200C oven for 10-15 mins to crisp up the crust, then serve.
Step by Step with Important Tips

Levain (Sourdough Starter)
Your sourdough loaf starts with making the levain. As I have said earlier, I assume you already have an active starter. If not, please refer to this video or get a friend to give you some.
Your sourdough starter contains the yeast which is needed to make bubbles in your dough and get it to rise. However, it also contains bacteria that produce acid that gives your sourdough that tang. This community of yeast and bacteria is dynamic and changes from day to day which is why it takes a while before you know how to handle the starter properly.
To get a better understanding of the science of sourdough, watch this video and read this article. Don’t skip this part! The whole key to a successful sourdough lies in knowing how your sourdough starter behaves. Understanding this bit will save you many packets of flour!

Now assuming that you have the starter mix 20g starter with 40g flour and 40ml water and leave it in a bottle to ferment. In about 5 hours it should triple in size and your levain is ready to be mixed into the main dough.
To achieve success in this journey, you WILL be making a loaf of sourdough bread every day or at least every few days. What I do is take out 80g of levain from the bottle to mix into the main dough. That leaves 20g in the bottle. I leave this in the fridge and the next time I just add another 40g of flour and 40ml water. This is a 1:2:2 mix and it works well for me. If your bread doesn’t rise well on the first day, it should, by the 2nd or 3rd day if you are baking every day.
I settled on this method because it is the easiest way of maintaining your sourdough starter if you are baking one loaf of sourdough every day or even every week. I learnt it from Bake with Jack. It’s practical and will save you from discarding a lot of sourdough starter and most importantly, it works!
Step 1: Mix Sourdough with Water
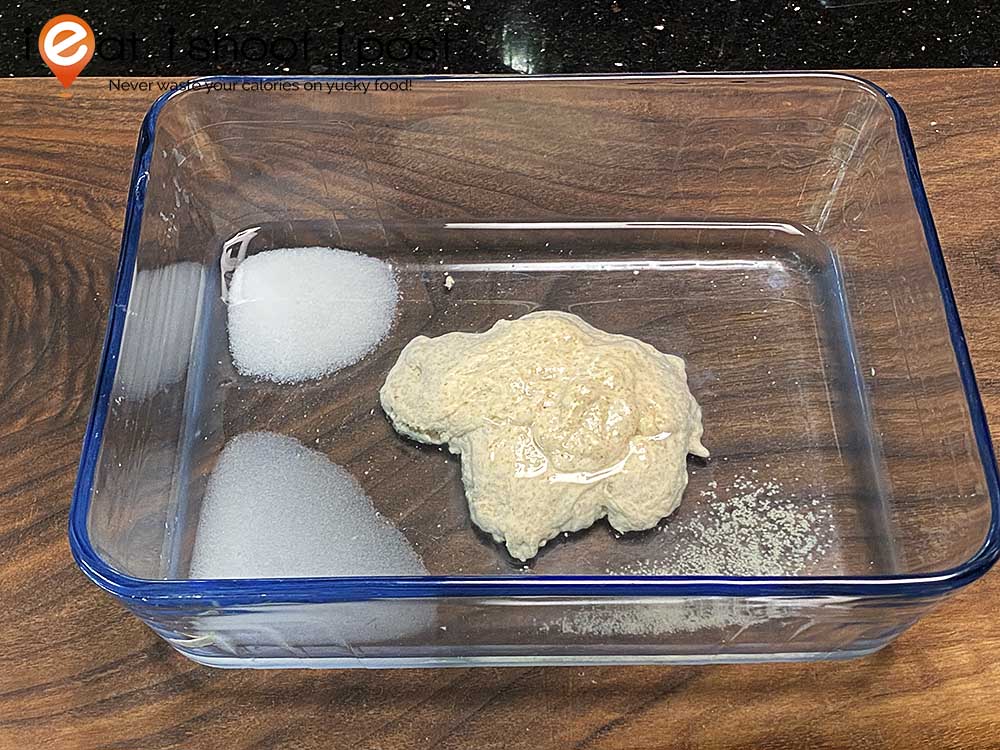
After removing 80g starter from the jar, add cold water and salt and roughly mix. I usually like to add a Tbsp of sugar to give the yeast a bit more food but this is optional. The sugar is not to sweeten the dough, just an extra step to ensure that the yeast is active. If you find that your starter is a little sluggish, you can add a pinch of instant yeast to the mix. That extra bit of yeast will help to produce more gas and tip the balance in favor of the yeast in the starter. It will also help to reduce the bulk fermentation time which usually takes 5-6 hours to about 3-4 hours. Something to consider on days when you don’t have that much time.
Step 2: Autolyse

Strictly speaking, autolyse is when you add flour to water without salt and yeast. This step allows the formation of gluten without the interference of salt and yeast. What I do is a fermentolyse which is when you add everything together and just leave it for 20 mins before you start kneading. During this time, the flour will absorb the water, and gluten formation will begin. Because the sourdough starter is going to take 5 hours to bulk ferment, you don’t really need to knead the dough. Gluten formation will naturally occur with time.
Gluten formation is a function of time and kneading. If you have more time, you will need less kneading. If you are using instant yeast to make bread, the bulk fermentation time is reduced and so you help quicken the development of gluten by kneading the dough.
Step 3: Bulk Fermentation
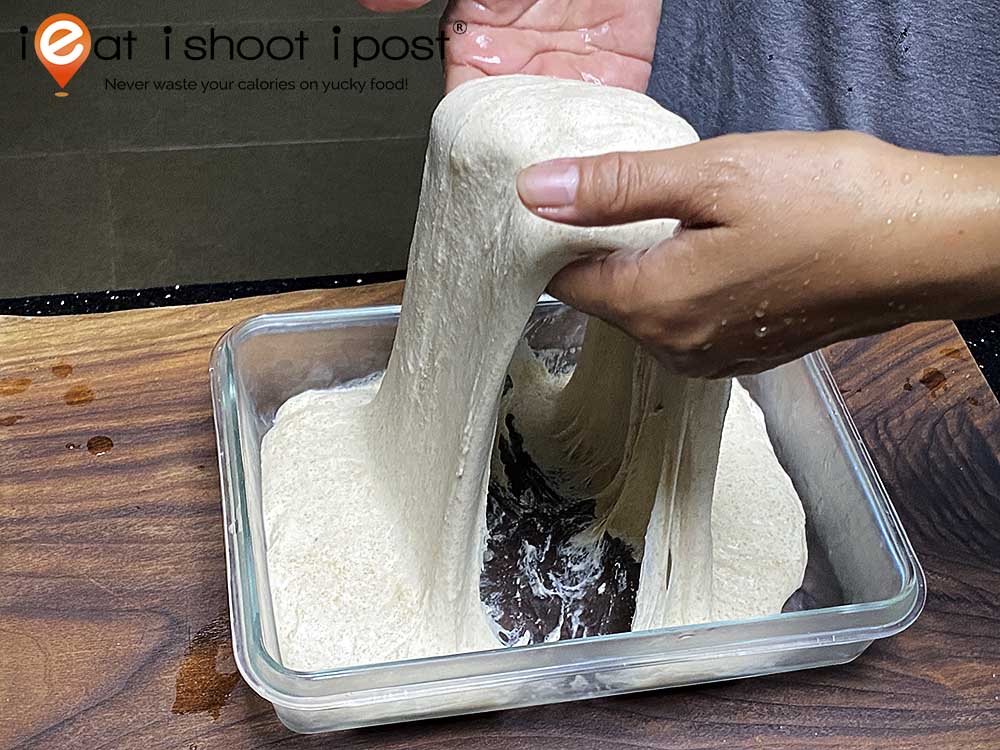
This is what I mean by Stretch And Fold
This is a Coil Fold
Once the dough is mixed, the next 5-6 hours is spent doing a series of stretch and folds. Some people approach this with religious fervor and have a strict regime of timing and type of dough stretching techniques. I don’t bother. I just leave the dough on the kitchen counter and whenever I walk by, I might just give it a stretch and fold. Usually, I wait at least 20mins between each stretch and fold. Sometimes I stretch it between one to two hours. If I have the luxury to be doing something else in the kitchen, I just set a timer to 45mins and when it rings I stretch and fold it.

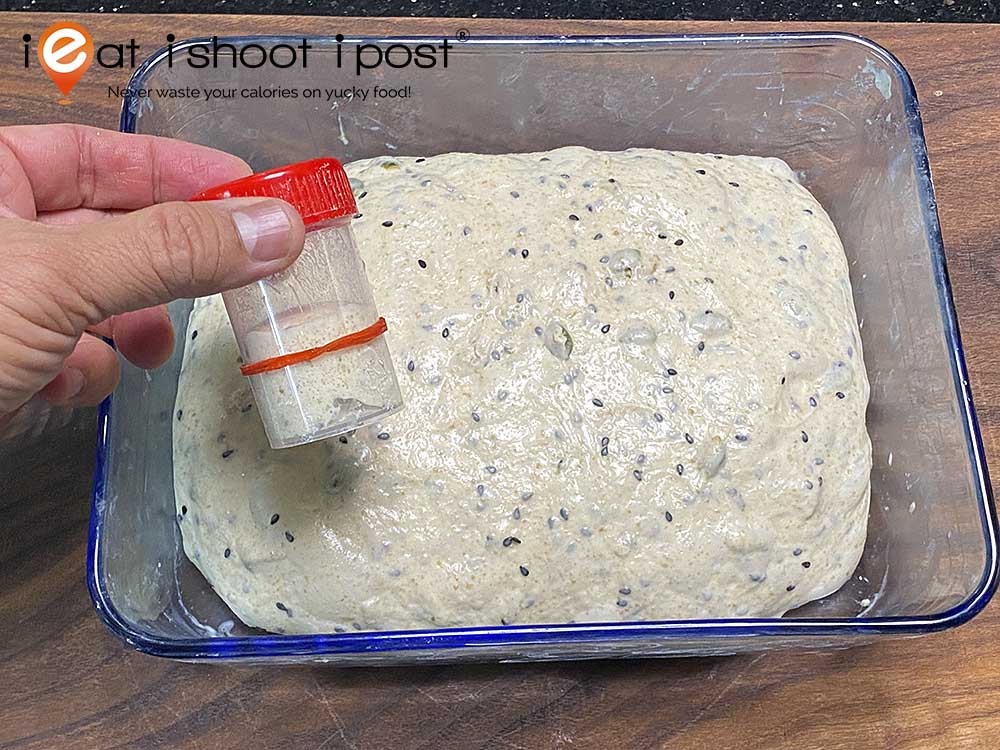
After performing your first set of stretch and fold, your dough should be quite smooth already but will feel very dense. Take a little bit of dough and place it in a jar and set it aside so you can monitor how much the dough has actually risen. Bulk Fermentation is done once the dough has doubled in size. You want to start pre-shaping the dough when the dough has risen by about 50% to 75% and finish shaping and proofing when it is doubled. That is when the dough will go into the fridge to proof overnight.
After around 5 hours and a series of stretch and folds, the dough should feel lighter and firmer and should be filled with bubbles. It should have risen by 50% at least. If it still hasn’t, then you will need to wait for another 30mins to an hour. When dealing with sourdough, you cannot follow a strict timeline. You will need to know how to read the dough and know when it is ready to be shaped. Each day’s starter is different and humidity and temperature of your kitchen also changes, so rather than relying on your clock, you need to just watch the dough to determine when to move on to the next stage.
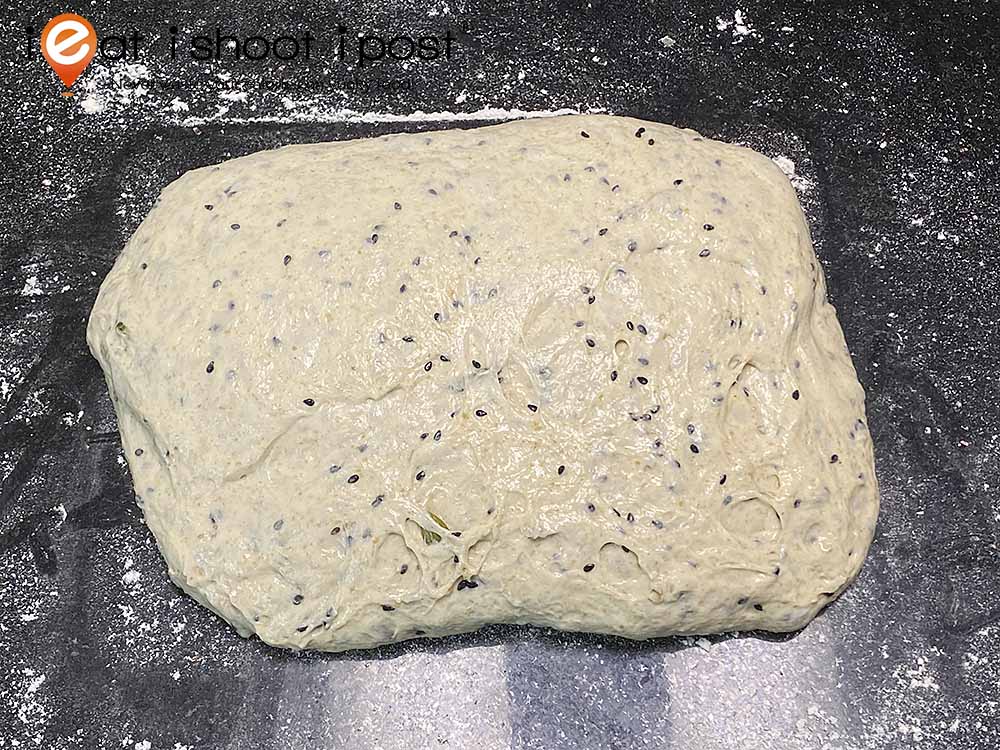
Once the dough has risen at least 50% – 75%, turn it out on a floured surface and roughly shape it into a rectangle or square depending on your container.
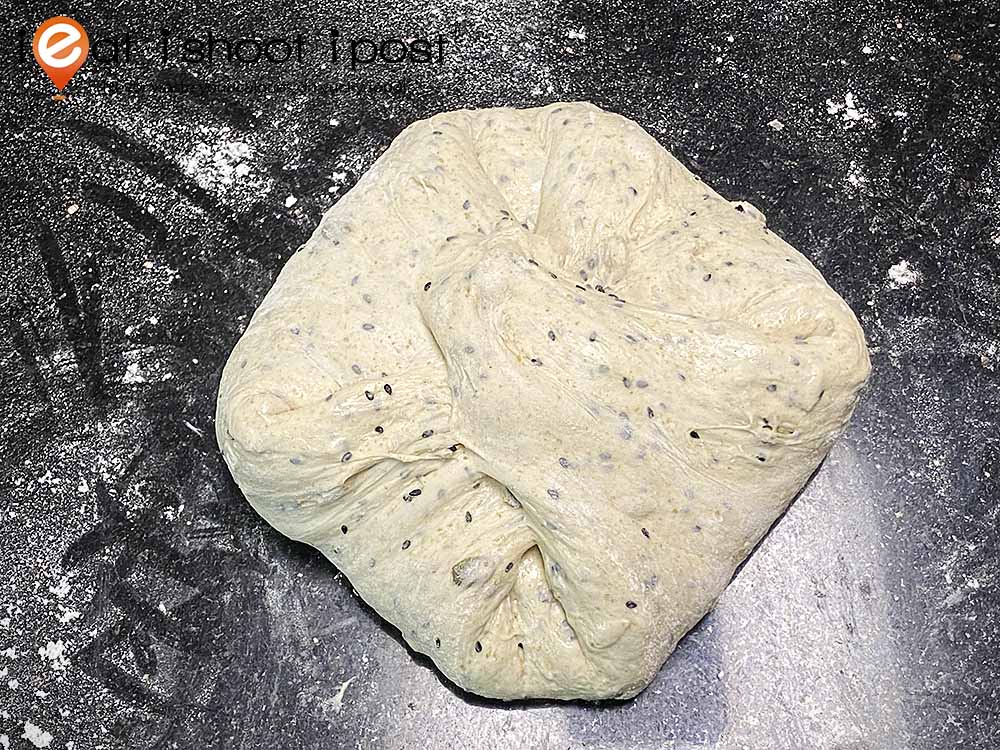
Fold the corners into the centre, flip the dough over, and shape into a tight ball
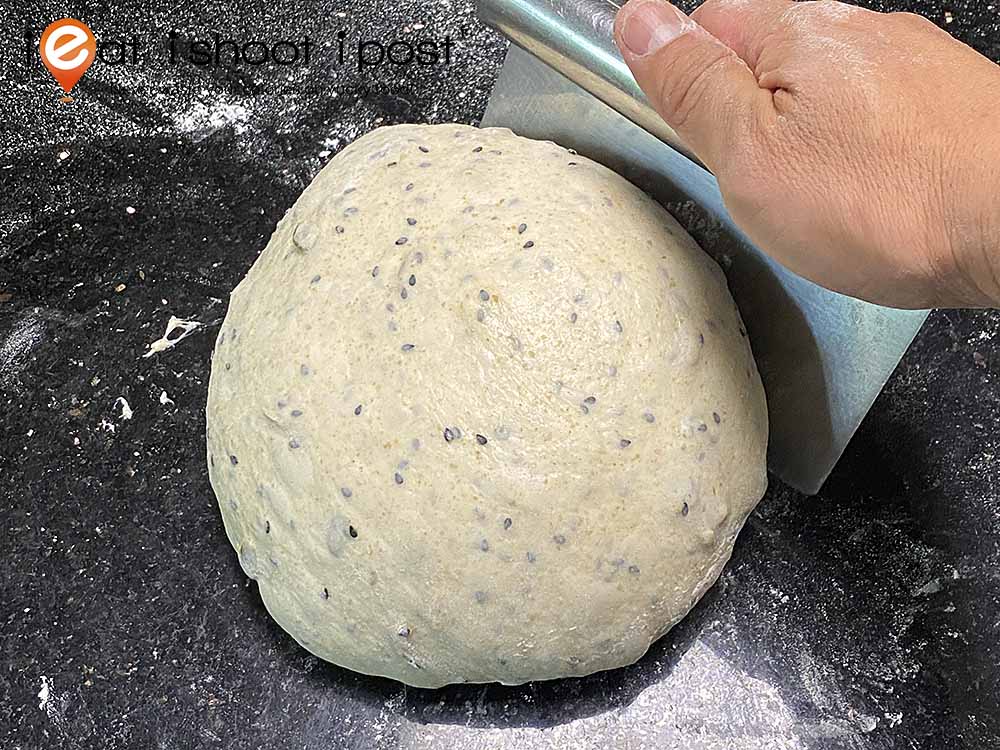
Get the ball as tight as you can, cover it with a damp cloth, and allow it to rest for 20mins.
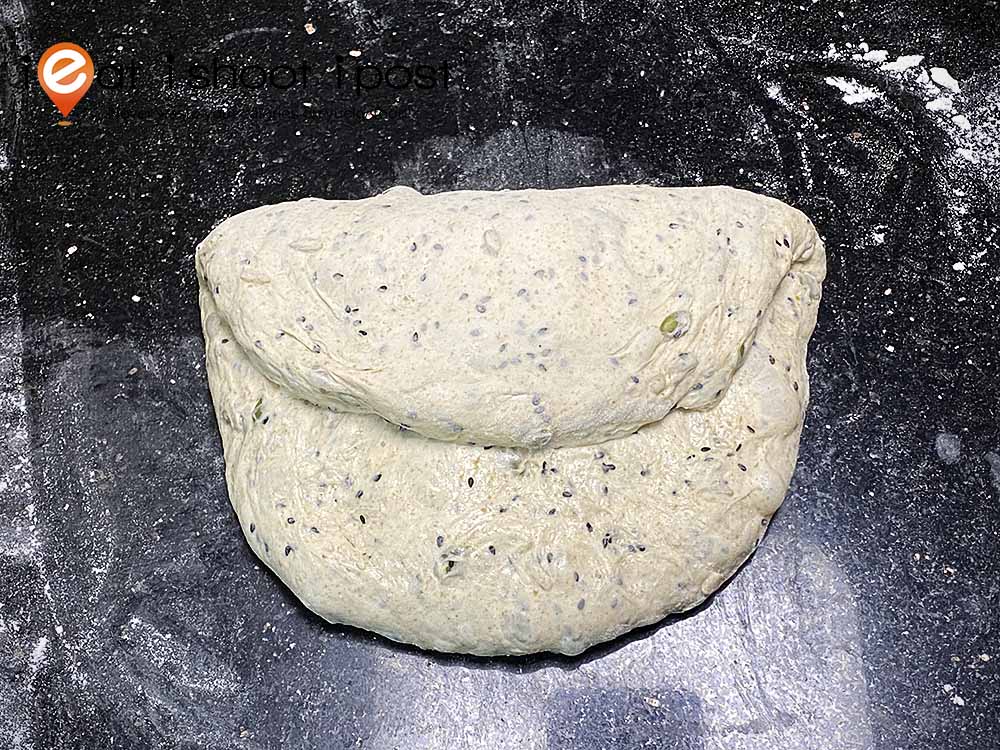
Turn the ball over so the smooth surface is on the table. Roughly shape into a rectangle and fold upper third to centre. Then fold lower third to centre.
It should look like a cylinder at this stage.

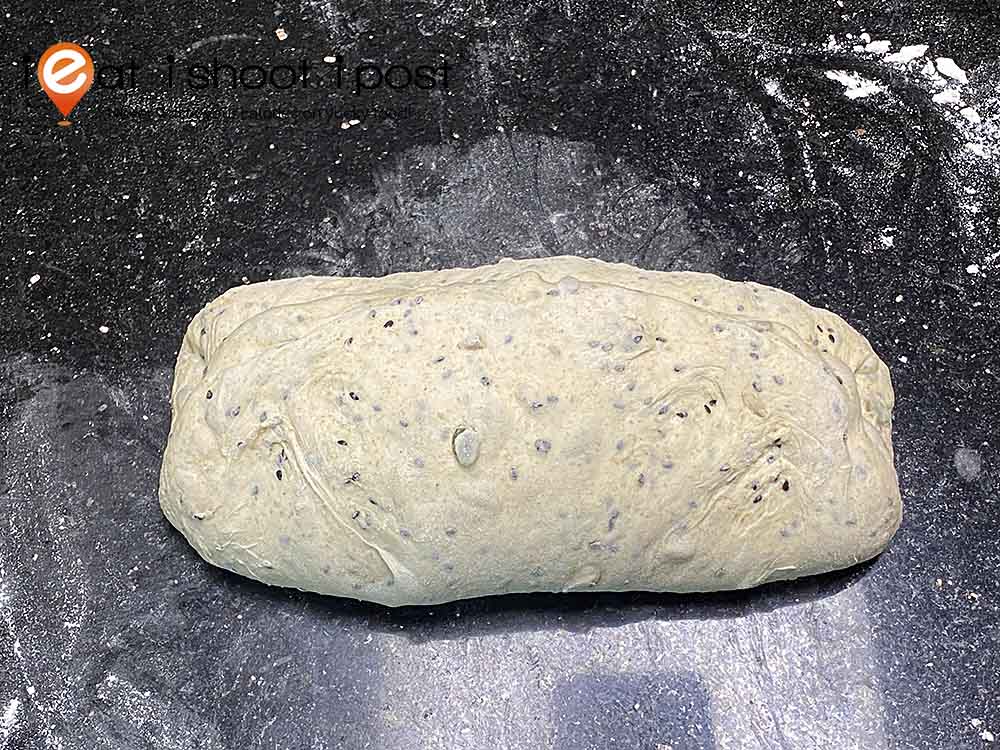
Starting from the narrower end, roll the dough tightly until you get a nice loaf.
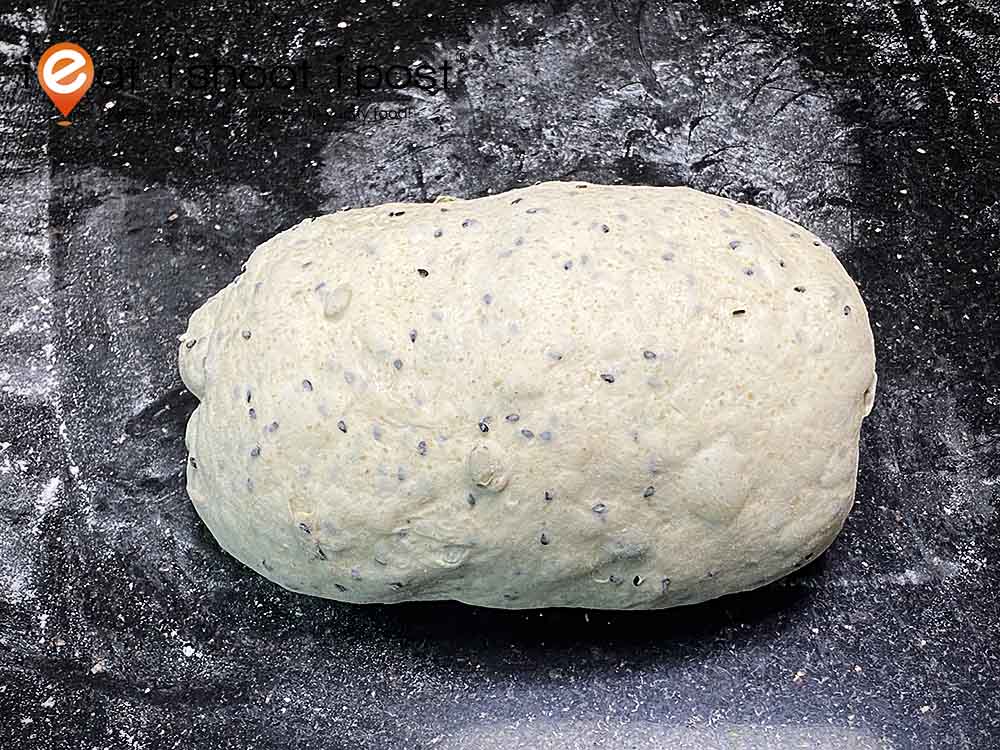
Loaf shaped and ready for final fermentation
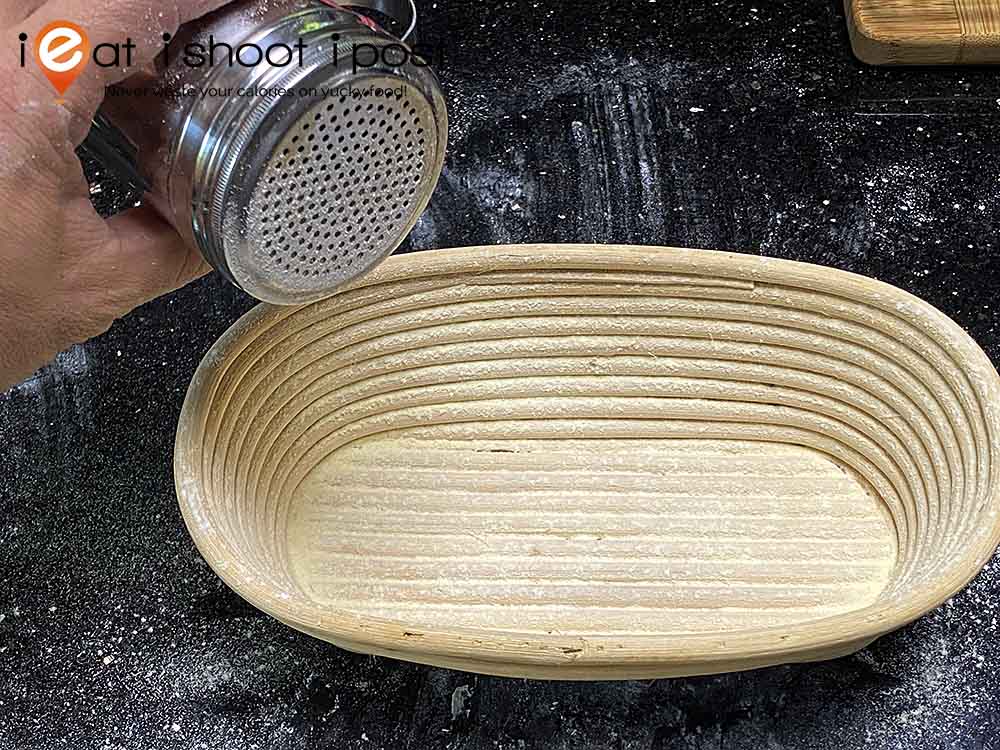
Dust the banetton liberally with flour. I like to use a 50/50 mix of semola and bread flour. Semola is semolina that has been ground again so it’s finer. It absorbs moisture better than bread flour.
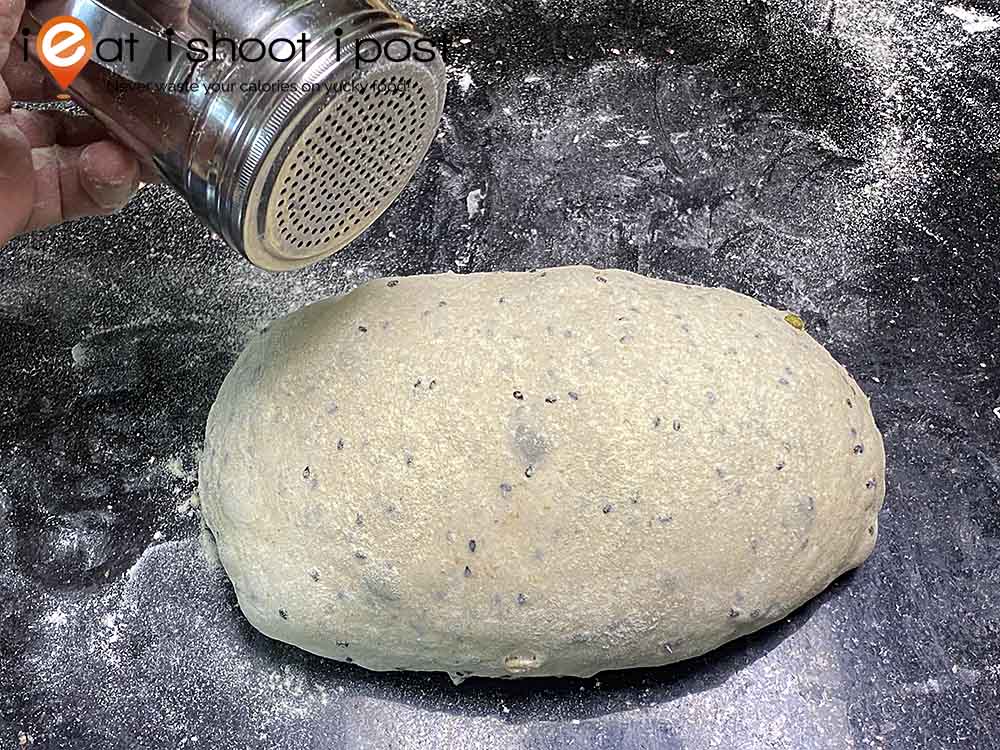
Dust the loaf and then turn it over and place it into the banetton.

Allow to rest on the table for 30mins, then place in a plastic bag and leave in the fridge overnight. If at this stage, your dough is already very airy, (like on an extra hot day) you might want to just place it in the fridge straight away.
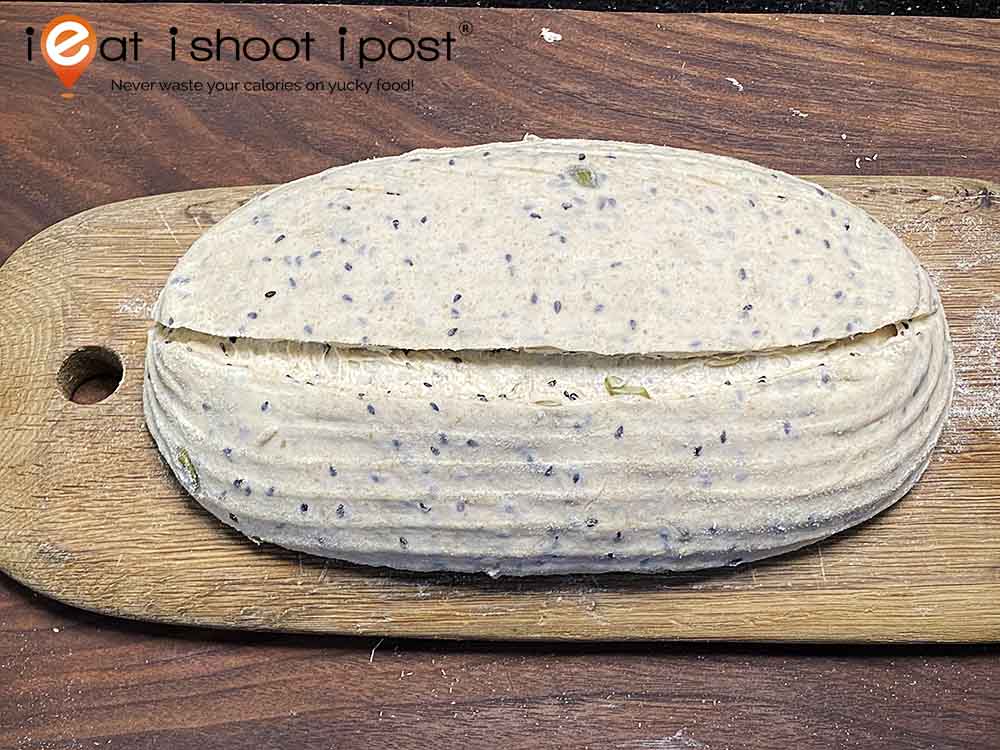
Next day, turn out the loaf and slash with a razor blade. The tip here is to angle your blade so that it is 45 degrees to the surface of the dough.
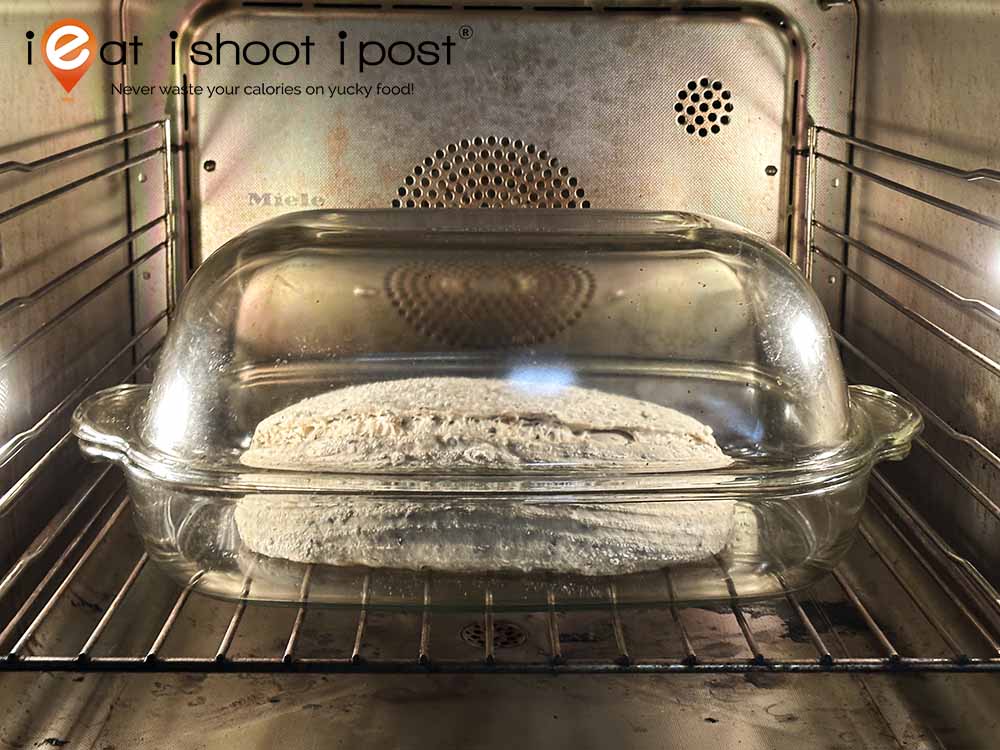
Pre-heat Dutch Oven (Mine is glass so I can see what is happening!) for 30 mins at 225°C. Place the loaf into Dutch oven and bake for 20 mins.
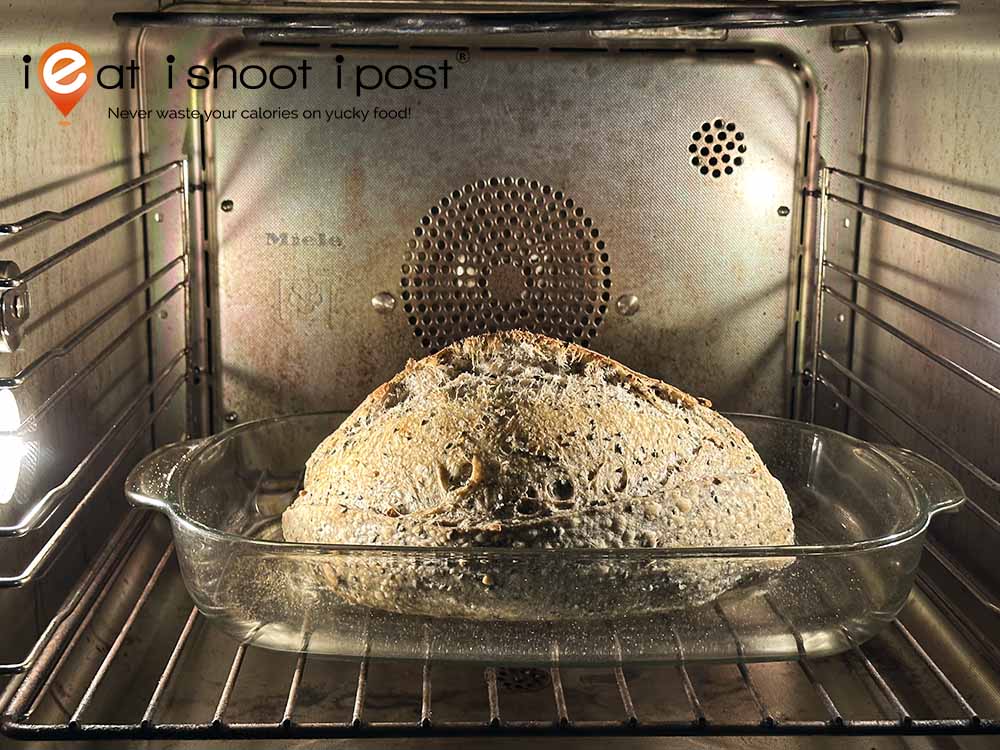
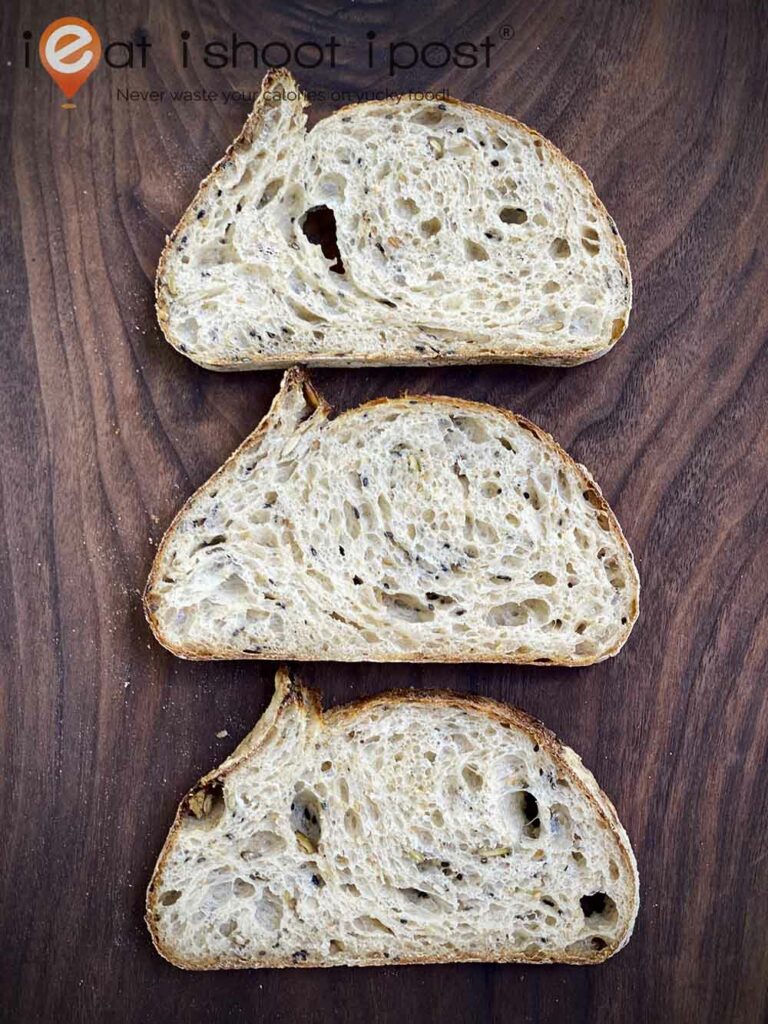
After 20mins, the loaf would have reached maximum rise. Remove the top lid, lower the temperature to 200°C, and bake for another 15 mins or until the loaf is golden brown. Remove from oven and allow to cool before cutting into it.
I wish you a pleasant Sourdough Journey!
Love baking? Here are more recipes you might be interested in:
Foccacia Bread Recipe
Pandan Chiffon Cake Recipe
Butter Cake Recipe
Kueh Salat Recipe
Banana Cake Recipe
Japanese Cheesecake Recipe
Bingka Ambon Recipe
Blackforest Cake Recipe
Pineapple Tart Recipe


I use the Ikea Bruen too and have the same combi oven :). Nice crumb
Thanks! Do you make sourdough bread too?
Curious to know if you have tried without any Dutch Oven and just using the steam combi oven functionalities, if so, what settings did you use ?
Yes, I have tried with a combi steam oven and it works well! https://www.facebook.com/ieatishootipost/posts/i-finally-decided-to-use-the-automatic-bread-function-on-my-combi-steam-oven-to-/812636100908205/
Hi Dr Tay, how big is your banneton?
It’s written in the post – 30cm x 14cm
Have read the post many times but just missed this info 😅…Thank you for the reply 🥰
Can i also have the brand of the glass dutch oven that Dr Tay uses?
It’s ok…i read that it is from Ikea 😜
I’ve followed your method and proofing times. I’ve a normal convection oven and i poured hot water into a tray. Yet I can’t seem to get good oven spring. Must I use a Dutch oven? I’ve tried turning off the fan to create a steam box for first 10min of baking. But still no spring. Any idea how I can get gd oven spring without a Dutch oven?
A dutch oven really does help. You can buy the one we use cheaply at IKEA Tampines. Costs something like $20 over
How many hours did it take for your levain to be ripe?
Usually we add the flour and water and wait 5 hours
Hi, thanks for sharing your sourdough journey. I just started mine in this hot and humid Singapore kitchen without air conditioned. Would appreciate your experience in dealing the hot & humid kitchen temperature of 29-31’℃ for starter, mixing, stretch & fold, rest, bulk fermentation, shaping, etc. before baking.
My problem are: the dough is too wet to manipulate, dough raised then went flat quick, the bread ended too gummy or spongy & dense…. see attached
Wet dough could be due to the type of flour you use. Try to use high protein bread flour. My recipe is based on Bob’s Red Mills Artisan Bread Flour. Also, you need to shorten the proofing time if the weather is hot. All these come with experience, and experience comes with many failed baking attempts. Just try try again until you succeed.
Thanks Leslie. This time I will use bread flour (13.1% protein) to establish the need Leaven with my starter. I will add 10% Whole wheat flour (15% protein) with 90% All Purposes Flour to make the dough with with 61% Water Hydration. Hopefully it will not be too sticky to work with.
I will proof it over 12hr in the fridge… Hope it will yield a better bread.
I think better to substitute Bread Flour for All Purpose Flour.
May I know what is the room temperature you prepare your dough?
Oh I never measure. It would probably be 27-30 degrees C
Thanks Leslie.
Hi Leslie, Yesterday was a good weather to make sourdough bread as the room temperature was around 27-28’℃. I also shorten the fermentation for 2.5hr. After shaped it, I put it in the fridge to cool proof for 11hours. After the proofing, I baked it in a dutch oven for 50min with lid on and followed by 5min baked without lid. The bread’s crust still quite chewy but the crumb is more open and soft than before previous bakes. I had increased the bread hydration to 68.7% for this load. Below is the recipe and the photo of the bread.
[Flour] : 65g Whole grain flour (15.3% protein), 155g Bread flour (13.1% protein) and 180g all purpose plain flour (11% protein).
[Water] : 260g
[Levain] : 100g with 1:1 (flour & water)
[Salt] : 10g
Would you mind to review and see what else I can do to make the crust less chewy and hard? Many thanks in advance.
See photo on the crust
I think you can push the hydration up and allow more time for proofing. The crumb looks a little dense still.
Many thank Leslie. I will increase the hydration to 71% in next bake. Do you mean the cold proofing hours should be longer than the current 11hours?
By the way, Leslie, do you keep the kitchen temperature to certain degree when you mix/stretch & fold/bulk fermenting/shaping/proofing your dough?
Hi Dr Tay, please let me know how soon the dough can be baked after taking out from fridge after overnite retard. Thank-you.
Oh, I just bake it straightaway!
Thank-you for your reply.
I’m about to move to Singapore, and stumbled on your lovely site! Have not made sourdough yet in this climate, do you find the heat & humidity of the city helps with fermentation & rise?
From a very excited Londoner, and soon-to-be Singapore resident!
Oh yes, it certainly rises quicker in our climate! Enjoy your stay!
Hi Leslie, thanks very much for your generous sharing. May I ask if the dough must be baked the next day after refrigerating it? Is there any issue baking it say 2 days later?
It might get too sour if you bake 2 days later and the structure may not be as strong. But flavour will be deeper.
Understand. Thanks very much!
Hi Leslie, I baked another loaf after one night of fridging and it was much better tasting, thanks for the advice!
However, I couldn’t get it to rise as well as yours (see attached image), with the nice air pockets. I wonder what I can do to improve this?
Haha, it just takes persistence and practise. You’ll eventually get there after 10 or 20 loaves! Plenty of Youtube videos online for you to consult!
Thanks. I guess that’s why it’s a journey!
Image
Hi, are you based in Singapore?
Yes