

I was quite surprised by the number of “Likes” that my photo of kueh salat garnered when I posted my first attempt on my Facebook page. Although I knew that kueh salat was a popular dessert amongst Singaporeans, I never knew t8hat it THAT popular! So since there is so much interest in it, I set myself to research and come up with a fool proof kueh salat recipe which everyone can do at home.
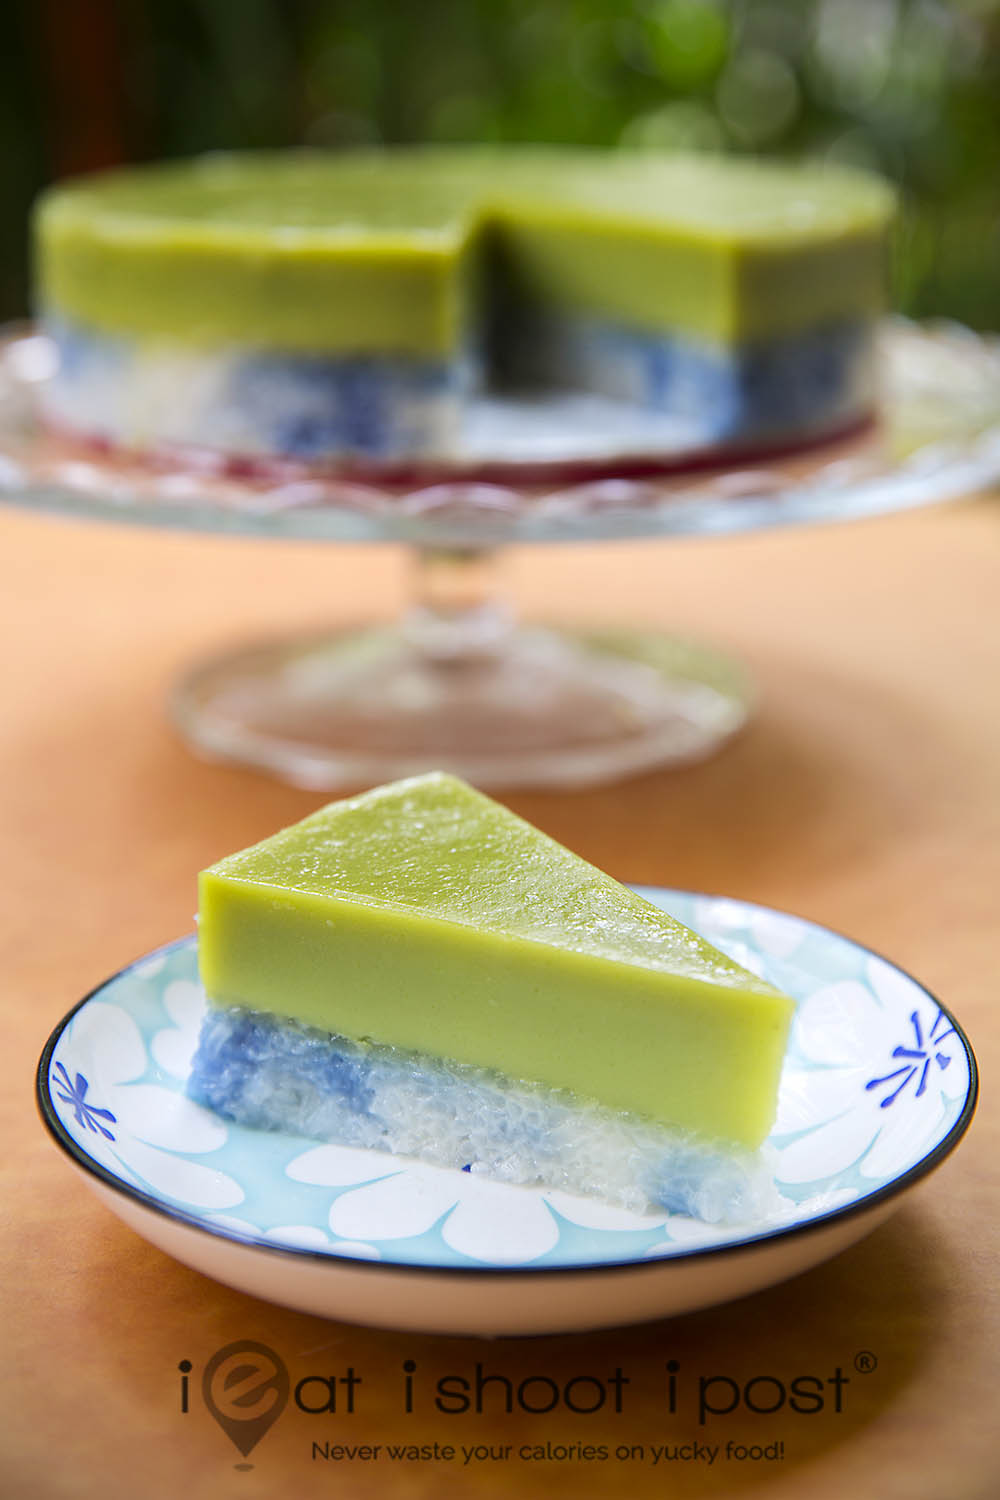
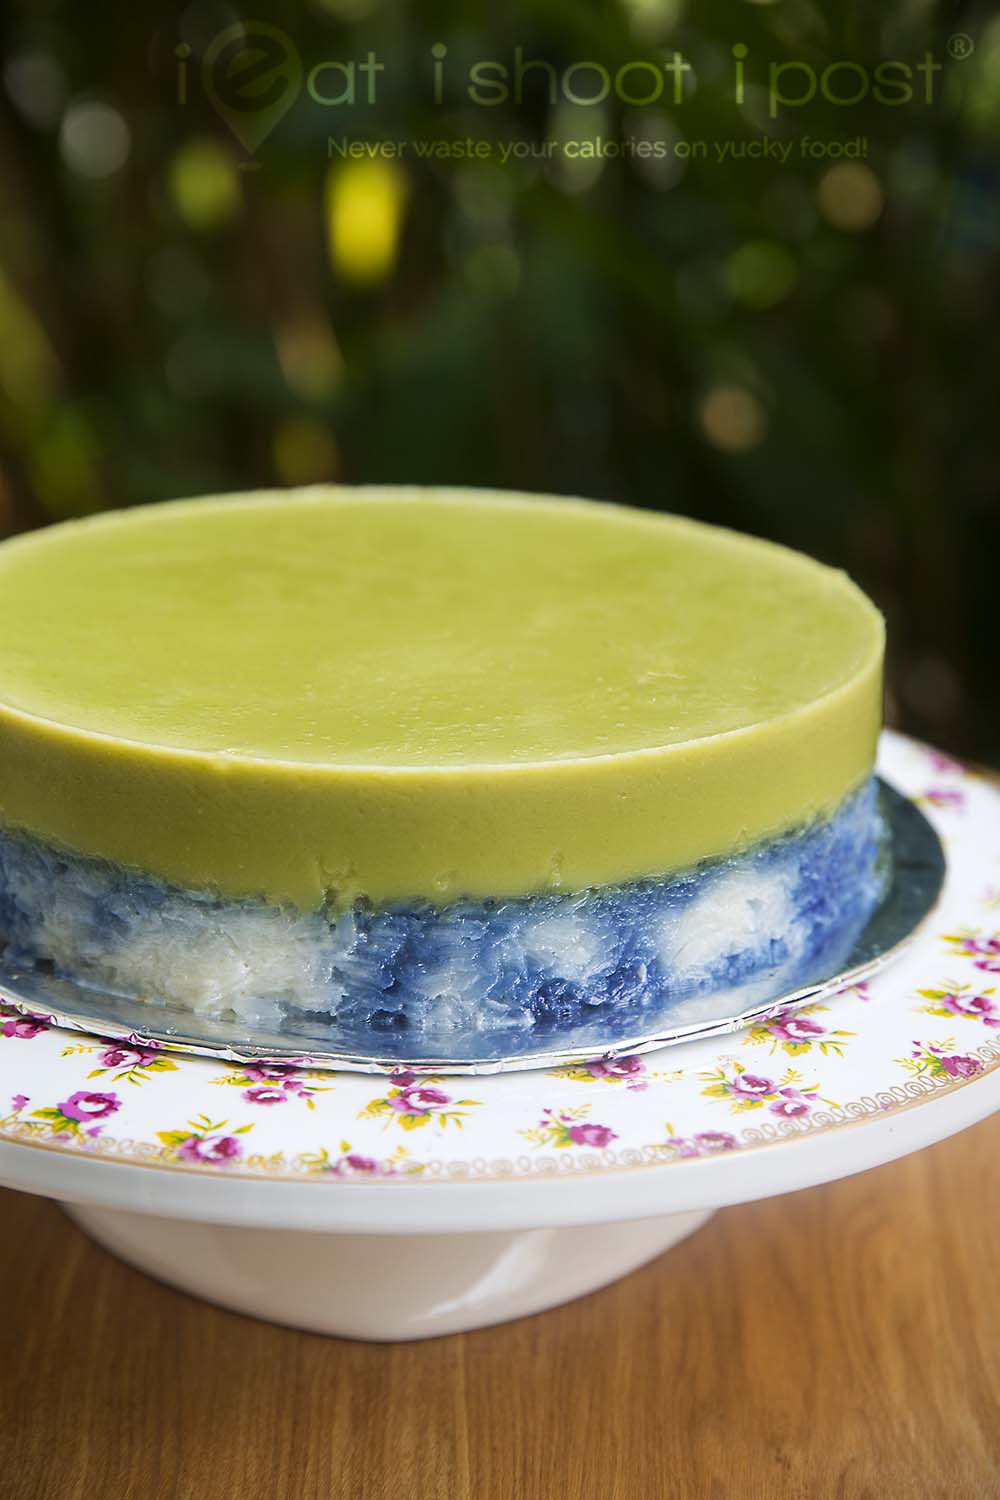
First, I need to define what I envision the perfect kueh salat to be. I find a lot of commercial kueh salat to be too heavy. The rice layer is thick and gummy and the kaya layer too firm. What I think a perfect kueh salat to be is to have a sublime kaya layer which is light and silky smooth like a pannacotta and a rice layer where the rice grains are still distinct and not so tightly packed so that when you bite into it, the kaya and rice will easily mix together.
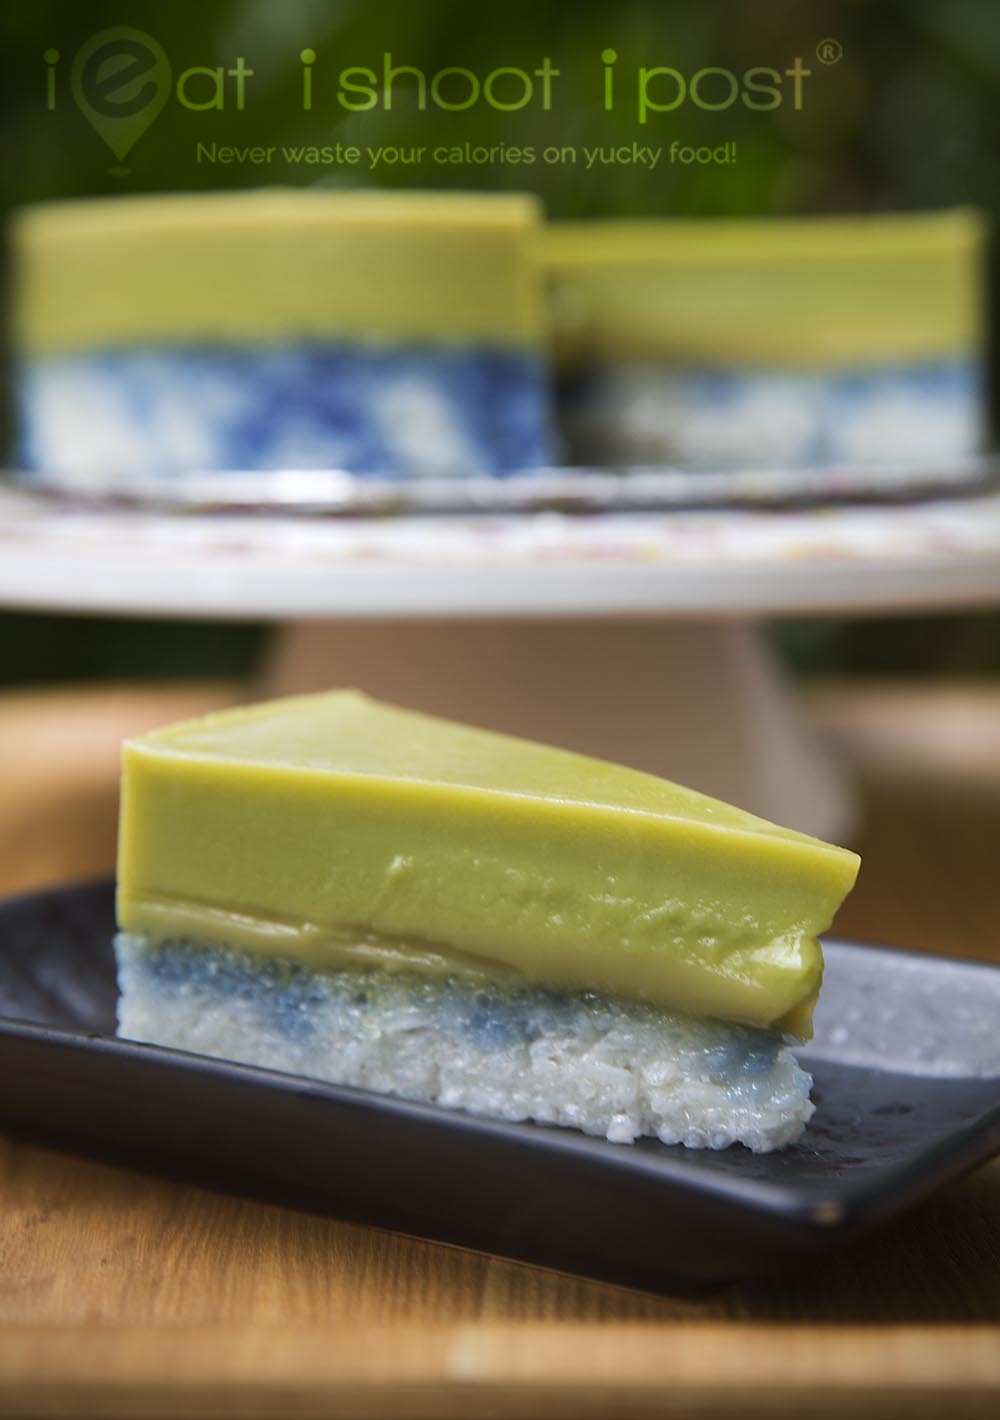
I managed to make the kueh salat which I liked but my softer kaya is so delicate that it breaks easily when you try to transport it. I also found that most people still prefer the firmer version which is what we all grew up eating. So in this post, I will give you tips and principles on how to make both versions.
I decided on the round shape because I wanted to serve it on a plate to be eaten with a fork. This helps to distinquish it from the usual rectangle slices which you eat by hand. You can, of course, make it into a square shape too. But, having it as a wedge makes it different from what you can easily buy outside. The last thing you want is for someone to taste your kueh salat and say that it’s “as good” as the ones from such and such a place. Heck, if it is only “as good”, you might as well just go buy it! No, you want them to say it is the best kueh salat ever and that they will not be able to get it anywhere else! Now, that will be a kueh salat worth your time and effort!
Here is the kueh salat recipe with detailed notes following:
Recipe
Click on the links of kitchen equipment/ingredients to buy them
Equipment:
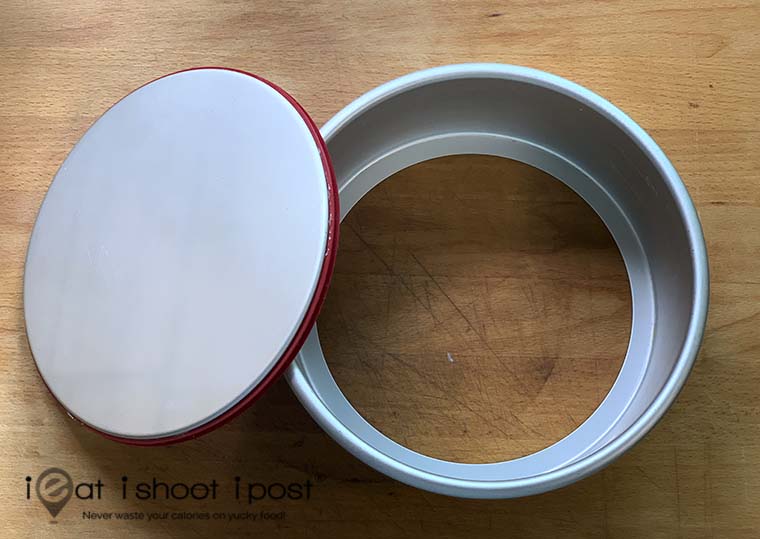
8 inch baking pan with removable bottom
Glass bowl set over a pot of simmering water
Ingredients
Rice layer
Glutinous Rice 2 cups (Standard Rice cup 160ml)
Coconut milk 120ml (first squeeze)
Salt 1 tsp
Sugar 50g
Bunga Telang flowers (blue pea flowers) 30 (boil in 100ml water to extract colour)
Kaya layer
Eggs 60g x 5 (300g-330g after cracking)
Coconut milk 350g
Sugar 250g (Can reduce to 150g to 200g if you want it less sweet)
Salt 1/2 tsp
Pandan leaves 10 large (to grind and squeeze juice)
Pandan leaves 15 leaves tied into 3 bundles (for cooking)
Custard powder or corn flour 40g (dissolved in 2 Tbsp water)
Plain flour 15g (Omit for silkier version)
Alkaline water 1/4 tsp (Optional – buy from bakery supply shops)
Method for kueh salat recipe
Prepare both rice and kaya concurrently.
Rice
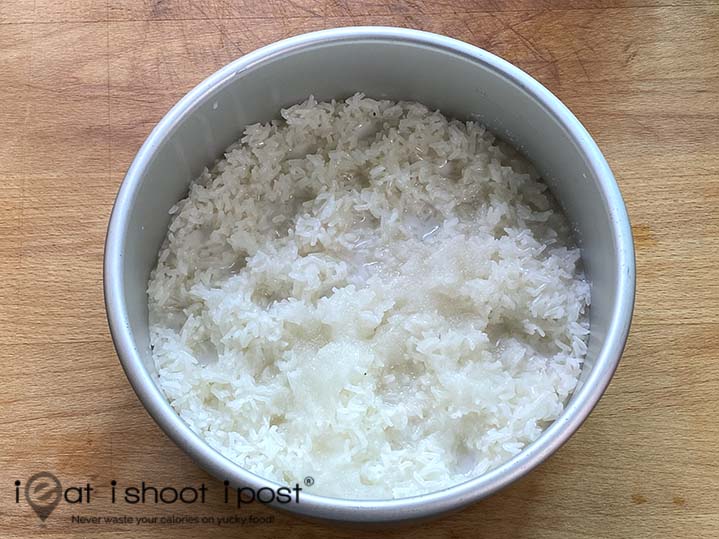
1. Pour boiling water into glutinous rice, stir well and let it soak for 1 hr to 3 hrs or until the rice becomes translucent and the centre is no longer chalky
2. Wash away excess starch and place rice in the baking pan
3. Steam for 10mins
4. Add coconut milk, sugar and salt to rice and mix evenly
5. Steam 10mins
6. Boil bunga telang flowers in 100ml water and strain.
7. Sprinkle blue ink onto rice in random pattern
8. Press firmly to expel any gas trapped in the rice.
9. Steam 5mins just before adding kaya.
Kaya
1. Blend or whisk eggs till the whites are completely broken
2. Heat coconut milk, sugar, salt and pandan leaves till pandan leaves are wilted and fragrance is released
3. Let the coconut milk cool to 80°C before adding it to the eggs
4. Blend 10 pandan leaves with 50ml coconut milk and squeeze out the juice.
5. Add the pandan juice, eggs and coconut milk, dissolved custard powder and alkaline water (if using) into a glass bowl and set over gently boiling water. (not furiously boiling)
6. Cook the kaya until the batter reaches a temperature of 80°C. It should be slightly thickened (but not too thick) with the consistency of light cream. Make sure you stir it constantly so that it doesn’t get lumpy.
7. Pour the kaya through a sieve onto the pressed rice. (rice must be hot)
8. Gently steam (90°C) for 40mins or until the middle of the kaya is no longer wobbly. If you are using a steamer, make sure the water is gently boiling and uncover the lid a little so that the steam is able to escape. If you steam it at 100°C, you will overcook the custard and bubbles will form.
9. Depending on your steamer, it might take anywhere from 40min to 1hr 15mins for the custard to firm up. Check by gently shaking the pan and gently pressing on the middle of the kaya. Once it is firm, you can remove it from the steamer and let it rest.
10. Allow it to come to room temperature before cutting.
11. Consume within a day. After one day, you will need to refrigerate it. Once it is refrigerated, you will need to steam or microwave it before consuming or the rice will be too hard.
Note:
If you wish to make a more tender custard, omit the plain flour and steam at a lower temperature (85°C) for a longer time.
Here are the steps in detail.
Rice
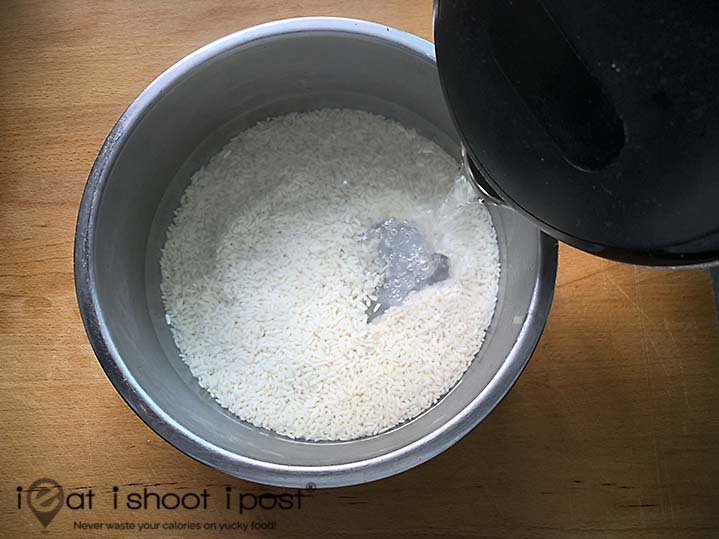
Most recipes just ask you to soak the glutinous rice overnight. However, I found that soaking in boiling water is better as it helps to reduce the starchiness of the rice as well as shorten the time it takes for steaming the rice. After adding the boiling water, just stir it a couple of times and leave it to soak for at least 3 hours or overnight.
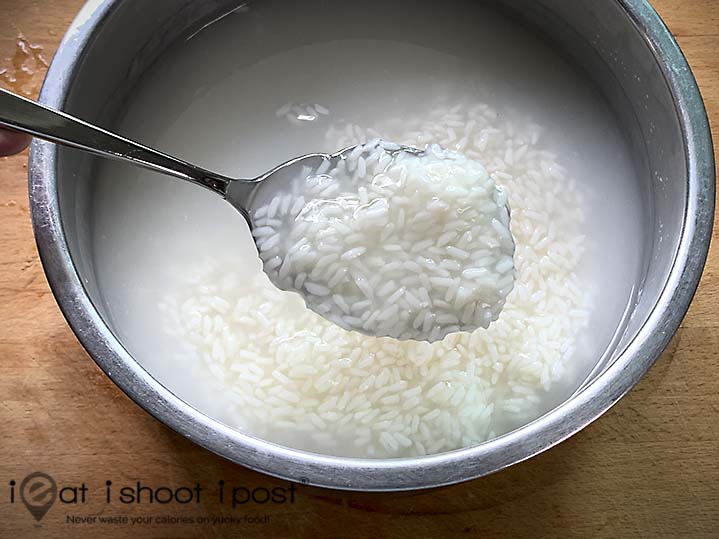
After 3 hours, you will find the rice is slightly translucent and a lot of starchy liquid. Wash away this excess starch. You are actually reducing the calories and the glycaemic index of the rice and making it healthier! (Healthier doesn’t mean healthy yeah?)
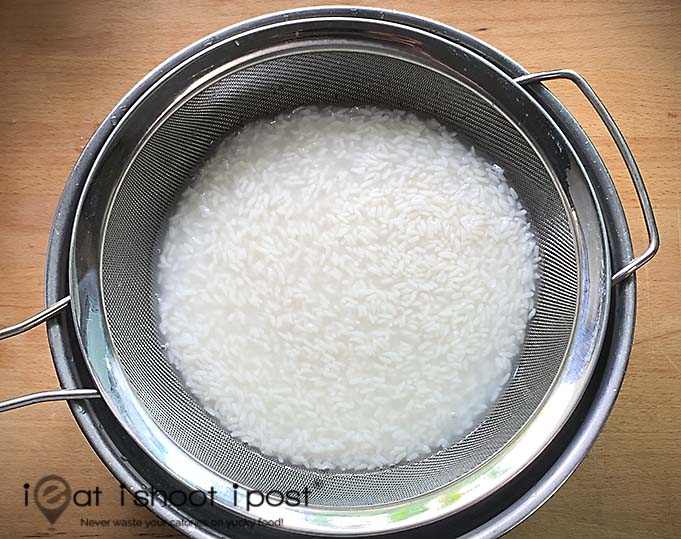
Wash the rice and strain.
Place the rice into the baking tin (If you don’t have a tin with removeable bottom, you will need to line the bottom with baking paper or banan leaf). Use your fingers to make several dimples in the rice so that it will steam evenly. Steam at 100°C for 10mins.
After 10mins of steaming, add coconut milk, sugar and salt and mix evenly. Then steam for another 10mins. The rice should be nice and tender by this stage.
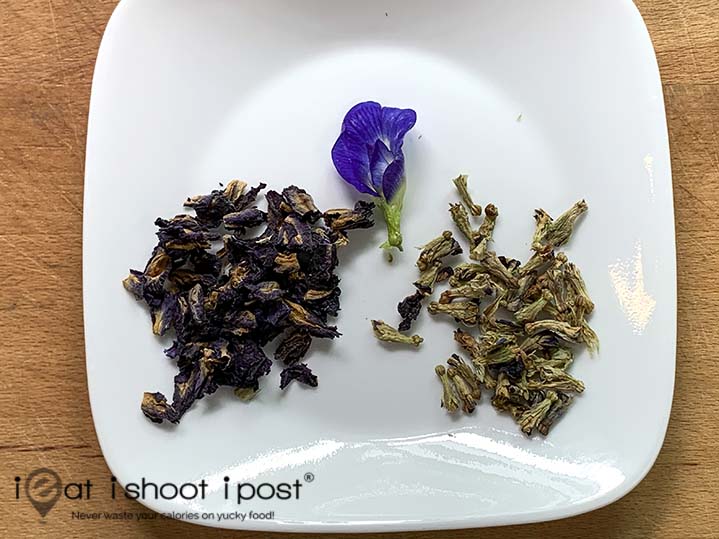
For the blue ink, you will need bunga telang flowers. The dried ones are available at bakery supply shops like Phoon Huat. One extra step you might want to do is to remove the green part. My friend tells me that it is not good to eat the green part, so it is an extra precaution. Bibik Kathryn from Peramakan says she removes it as it might cause a brownish tinge. If you can’t find the flower, you can use artificial blue colouring or just not add any colouring.

Bring the flowers to a boil for a few minutes to extract the ink then sieve and sqeeze out the blue ink. You can put this into a squeeze bottle for easy application.
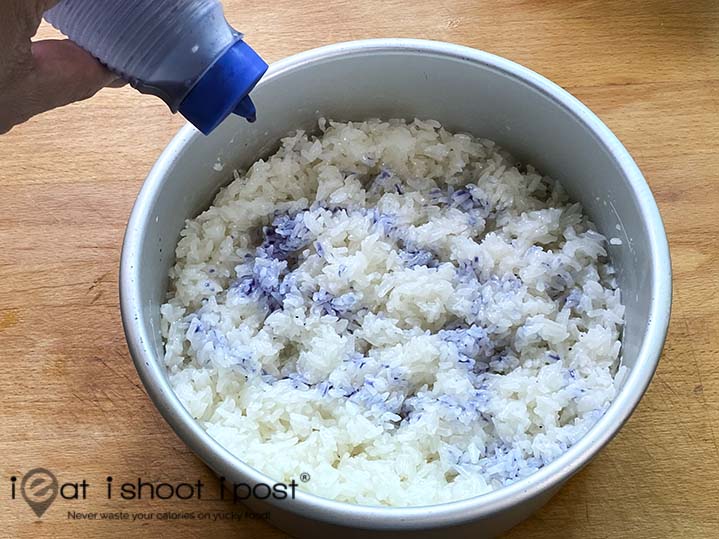
Add the ink into the rice in a random fashion, making sure you ink the sides. You should use a fork to make holes in the rice so that the ink will be able to seep down to the bottom.
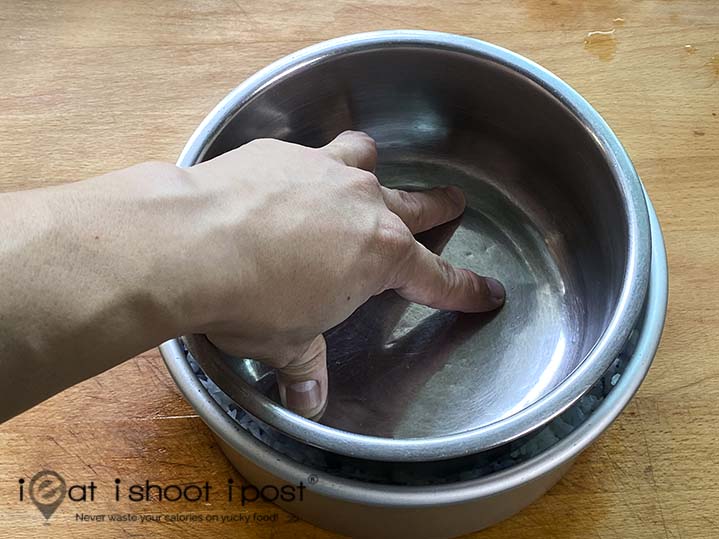
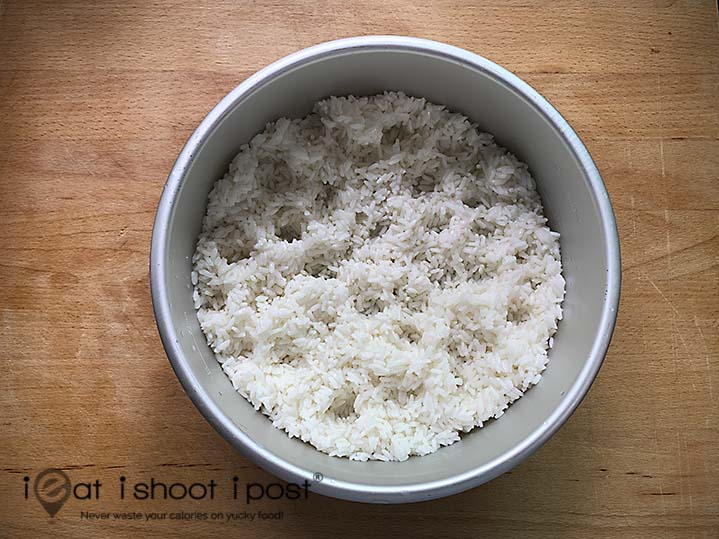
After inking the rice, use a flat bottom bowl and press down firmly to expell all the air. It is important you do this when the rice is hot and moist. If you make the mistake of fluffing the rice and leaving it to dry, there may be air bubbles trapped in the rice layer which will rise during the final steaming process and leave your kaya layer like the surface of the moon. Trust me, I know.
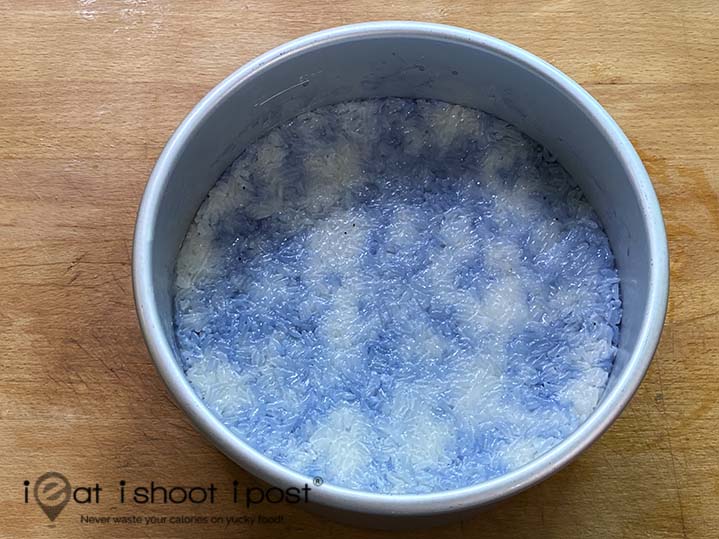
This is how it looks like after pressing. Steam for another 5mins before adding the kaya. The surface needs to be hot when you add the kaya, so you need to time it properly.
Kaya (make concurrently)
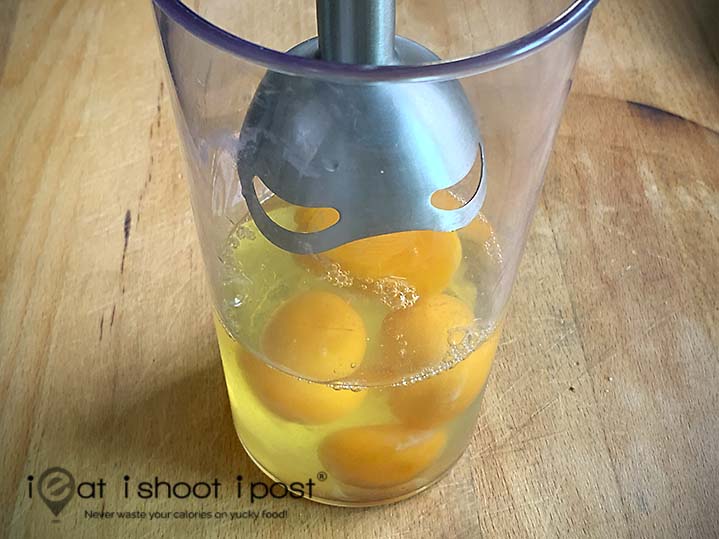
Using a hand blender will ensure that your eggs are evenly beaten so that the whites are no longer stringy. If you don’t have a hand blender, use a fork and beat and then strain it.
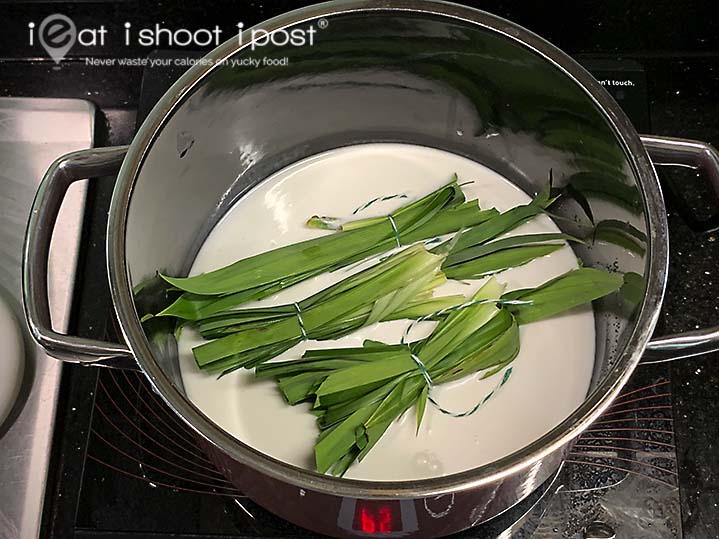
Most recipes don’t call for cooking the batter first. However, I find that the fragrance is enhanced when you simmer the coconut milk with the pandan leaves. The pandan juice provides the green colour, but not as much aroma as when you boil the pandan leaves. So bring the coconut milk, sugar, salt and pandan leaves to a gentle simmer and cook till the pandan leaves are wilted.
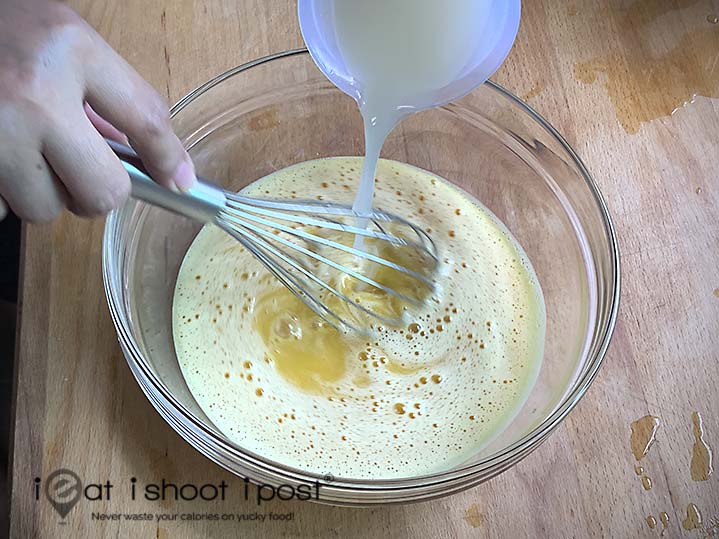
Make sure you let the coconut milk cool a little (cool to 80°C before you add it to the beaten eggs. Stream the warm milk into the eggs while stirring constantly. Keep stirring until the mixture turns greenish and has the lovely smell of pandan. Now you add the pandan juice and custard powder mixture.
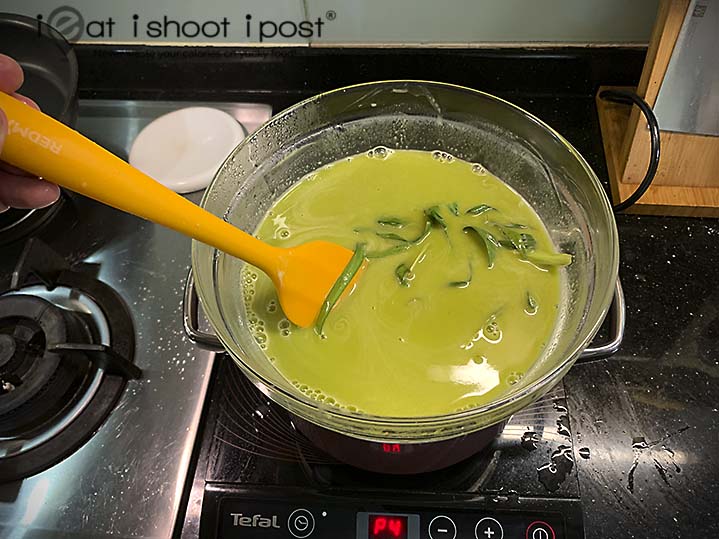
Now gently warm the batter up to 80°C using a bain marie (ie set your bowl over a pot of gently boiling water). 80-85°C is the temperature where the eggs start to thicken and the cornflour starts to gelatinize. This is the most crucial step in the whole process. If you let the kaya thicken too much, it will become lumpy instead of smooth. So watch it like a hawk. Once the consistency is like light cream, remove it from the flame.
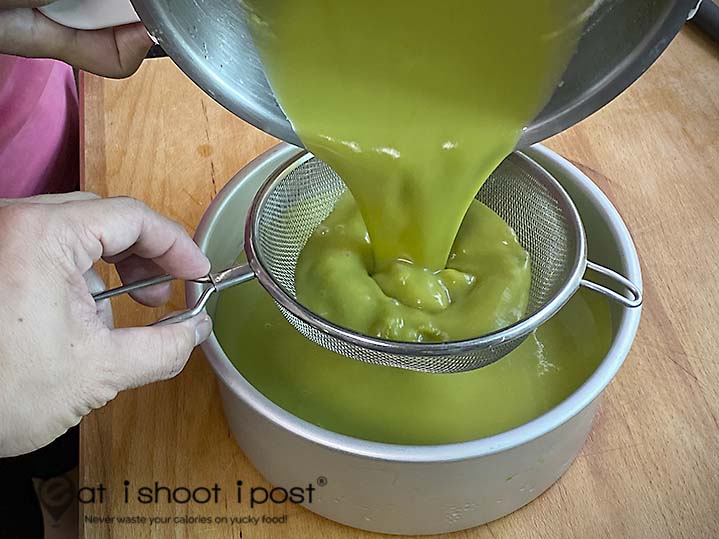
Sieve the kaya onto the hot glutinous rice. The rice has to be hot in order for both layers to stick together nicely.
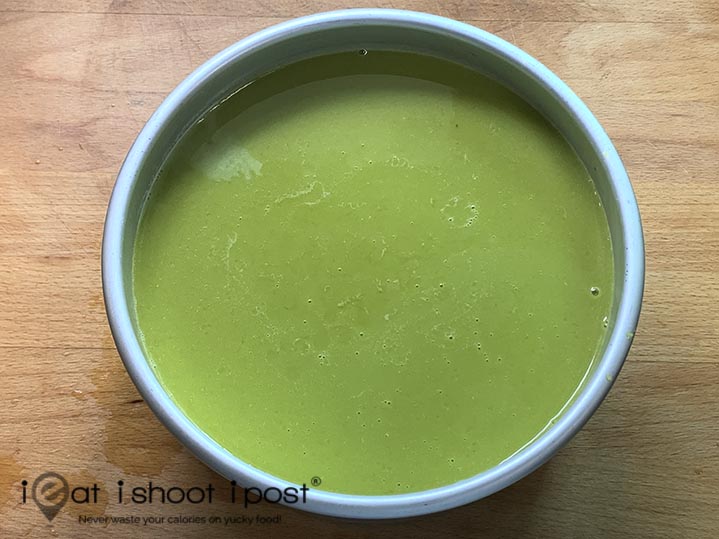
Make sure you give the baking pan a few sharp knocks to expel any bubbles and then place it in the steaming oven to steam.
For softer version , steam at 85°C for and steam for 1 hour 15mins or until the middle of the cake is no longer wobbly.
For firmer version, steaam at 90°C and steam for 45 min to 1 hour or until the middle of the cake is no longer wobbly
If you are using a normal steamer make sure that water is not at a furious boil and place a chopstick between the wok and the kid to keep the lid slightly ajar so it doesn’t get too hot. After 45 mins, gently jiggle the pan to see if the kaya is set. If still too wobbly, then steam it longer. The kaya layer is ready once the middle is firm. If you want it really firm, increase the heat. If you want it silky smooth, lower the heat and steam for longer time.
Additional notes
1. After steaming, allow the cake to cool before depanning.
2. Wet your knife before slicing to prevent the glutinous rice from sticking to the knife. Even better if you have a wire cake cutter.
3. Best not to put the cake in the fridge as the rice layer will harden. Best to be eaten within 1-2 days.
4. If you do leave it in the fridge, you will need to re-steam the kueh or warm it up using a microwave oven.
5. If you want the kueh to look like the one from Chalk Farm or Coconut Club, just cook the batter to 90°C where it becomes a thick kaya and spoon it onto your baking pan. Steam it for an hour or until the surface is firm.
6. Depending on the quality of your pandan leaves, you might find that the colour of your kaya is a little pale. You may want to add some pandan paste or apple green colouring to improve the appearance of the kaya.
And viola! You have made a beautiful kueh salat! Thanks for trying out my kueh salat recipe. Remember to hit the share button and share this with all your friends if you enjoyed it!
Disclosure: Some links above are affiliate links, meaning, at no additional cost to you, a small commission is earned if you click through and make a purchase.
Check out our other dessert recipes:
Pandan Chiffon Cake
Cendol
Bika Ambon
Japanese Cheesecake
Butter Cake
Places to eat Kueh Salat:
Peranakan Khek


Thanks for your recipe and detailed explanation. For the rice, the first step is to steam it without coconut milk? And wouldn’t the coconut milk flow out if you use a loose bottom pan for steaming the rice at the next step?
No, the coconut milk will be absorbed into the rice.
I tried. The coconut milk flow out …
Flow out of where?
From the bottom of the loose bottom baking pan
Really helpful tips for a smooth kaya top because i have been having “pimples” top for my sarlat..thanks
So glad that it was useful!
Hi Leslie, you indicate 350g coconut milk. Is it packet coconut or if you squeeze the real coconut how many grams to produce 350gm coconut milk? Wondering aloud?
Thanks
Pauline
Hi Pauline,
I usually buy coconut milk from the market that is already squeezed or use UHT coconut milk. About 1 coconut if you are sqeezing your own.
Hi Dr. Tay, I am hoping to try to recipe tomorrow but wanted to verify some numbers here:
1) For 50 ml of coconut milk to make the pandan juice -is the goal to extract 50 ml of pandan juice?
2) Is it a total of 350 ml of coconut milk ie. 300 + 50 ml for pandan juice or
350 ml +50 ml for pandan juice?
I guess what I am asking is the total amount of liquid (coconut milk) for the kaya layer.
Thank you much!
Jo
Hi Jo,
Coconut milk plus pandan juice 350ml
Hi Dr Tay,
when you say to stay making kaya concurrently, at which stage of preparing the rice should i start making the kaya, is it once the rice is done with the long soak? Thank you.
It doesn’t really matter. The rice can be made first and cooled. So can the kaya. Both just need to be ready so you can put it together.
Hi Dr Tay,
However you mentioned that the rice should be hot when you pour the kaya over for it to stick nicely together. Hence in terms of work flow, the question is when is the best time to start with the kaya making? This question comes from a noob who does not want to be panicking that I’ve started making the kaya too late. Thanks!
You can always get the rice ready first and then just steam it for a few minutes before you add the kaya
Mayiknow when to use the alkaline water?
At step 5. I have updated the post to reflect this. Thanks for your question.
Hi, can I check if I can use UHT coconut milk instead of freshly squeezed?
Sure, of course you can.
May I know when is the plain flour added? Thanks
If you want to add plain flour, add it together with the custard powder
Hi Dr Tay, when you say 350g , is it same as 350ml? TIA
Yes. It is approximately the same.
Hi Dr Tay,
For the rice layer, is the total amount of liquid needed is 220ml(120ml coconut + 100ml water)?
If I skip the blue pea stain, do I use only 120ml coconut milk for the rice?
Thank you.
You don’t need the extra 100ml water. The water is basically used to steep the blue pea flower. You won’t need to use all of the blue colour water.
Hi there! I’ve tried your recipe and I’m wondering how to increase the fragrance of the pandan. Is there any difference if I cut up the pandan leaves when cooking vs tying it into a knot? Cutting would make it easier to manage in the pot as well.
You can chop up the pandan leaves and place in a small soup filter bag. At the end of the day, it really depends on the quality of your pandan leaves.
Dr Leslie, when I blend the pandan leaves with the coconut milk, it produces a weird smell. I’ve tried 3 times but still can’t figure out why. And I can only do pandan leaves with water then add to the coconut milk but that reduces the coconut fragrance of the kueh. Any idea why and what can I do?
Not sure what happened. Works well when I do it!
Hi Fel,
Sorry for chiming in this (one year!) late. I also faced the same problem that you reported. The weird thing was: for many years, like Dr Leslie, I had no problems blending coconut milk with pandan leaves. Then, one day, the process suddenly became literally funky, and for the life of me I could not figure out or fix the problem.
I eventually worked around it by combining pandan juice with coconut *cream* in a 50-50 ratio to produce the required amount of coconut milk, based on the logic that coconut cream is but dehydrated coconut milk. So far, it’s worked for me. I use Kara’s coconut cream, in large part because the brand passes Christopher Tan’s muster – and, hey, if a fellow Baba/Peranakan who is as detailed and careful as Christopher Tan thinks it’s usable, who am I to disagree? XD
Hope you’re still having fun making kuih-kuih/kuih-muih!
Glad you found a way around the problem! And happy to hear from you even if it’s one-year later. God Bless!
Thanks, Lisa! And God bless too!
Kara coconut cream has been thickened with carageenan. That is why it is thick.
Not to be contrary, Leslie, but according to Kara’s ingredient list, the only thickening/stabilising agents are Xanthan and Guar gum, which are rather different beasts from Carrageenan. Plus, while the Xanthan and Guar would surely have a thickening effect on Kara’s coconut milk, dehydration is still certainly a part of Kara’s production process for coconut cream. Their standard coconut milk contains only 17-18% fat, whereas their coconut cream contains about 24-25% fat.
Like I said, no disrespect or contrariness meant! I am simply highlighting this because I do believe that the logic underlying my combination of cream with pandan juice still stands.
I stand corrected. It is xantham gum, not carrageenan. Thanks for pointing it out.
Hi Dr Leslie Tay, May I know what is the impact if alkaline water is omitted ? Thk u
It just wont be as chewy
Thank you Dr. Leslie for the detailed recipe, I used a combi oven at90c following your recipe and it turned out beautifully- just wondering if you measured theinternal temp of the kuih after IT was done? What should it be?
Hi Elaine, its done once the custard registers 85C.
Hi Dr Tay, I’ve made this Kueh Salat from your recipe and was so delish. I’m residing in Sth Aust and my family love it. Thanks again.
Thank you for sharing this recipe. It was a little daunting at first, with all the detailed steps but I am glad I went with your recipe as my kueh salat came out ok! i just need to fix the rice bit as it could have been slighter softer. will be making this again. thanks again for the clear instructions 🙂
Glad you liked the recipe!
I made this for my care group yesterday and everyone loved it! Thank you so much!
That’s wonderful! Thanks for your comment!
I just made. I love it and I don’t even eat kueh salat that people make or gift me.
Oh wow! Thanks! So happy you like the recipe!
Can I confirm that if I use kara coconut cream (which is more easily available) when the recipe called for use of 100ml coconut milk, I can use 50ml cream + 50ml water = 100ml coconut milk.
Thank you
Just use the Kara without diluting with water.
Dr Leslie, thank you for the recipe and all your helpful tips. I could not take the custard to 80 degrees when cooking it. But the end result of the whole kueh was good and very fragrant. I want to know if the cornflour quantity can be reduced or omitted altogether? Using 2 tbsp of water, I could not get the cornflour to dissolve into a smooth paste so I kept adding more water, and the custard had a very slight grit. I don’t know if custard is different compared to cornflour?
Also, my cooked rice had a yellowy tinge. Is it a quality issue or my ingredients or my cooking? Thank you in advance.
Hi Michelle. You can lessen the cornflour. Adding more water shouldn’t cause grit in the custard. I am not sure why your rice has a yellow tinge. Maybe you can try with a new pack?
Hi Dr Tay,
I came across your kueh salat recipe a few days ago and want to start cooking it. Before i start, I like to clarify on your recipe under Kaya section, “4. Blend 10 pandan leaves with 50ml coconut milk and squeeze out the juice”. May I check if it is 50ml coconut milk or should it be more?
In addition, may i check if the coconut milk used in making of the kaya layer is also first squeeze coconut milk? Can I use coconut cream to replace first squeeze coconut milk?
Thank you for your time.
You just need a little liquid to blend the pandan leaves properly. You can use more if 50ml is not enough. Usually water is added but I don’t want to dilute the pandan juice.
Hi Dr Leslie,
I tried making this a couple of times and my kaya layer separates into 2 different shades of green. What am I doing wrong?
Thanks so much for your help!
Maybe you need to cook the kaya a bit longer so that it is set properly
Hello Doctor, thanks so much for the recipe. As I didnt have a 160ml rice cup, I used 4x 1/3 standard measuring cup (79ml capacity) but the rice layer turned out a bit hard. Could you please share much the glutinous rice should weigh in grams? Also, for the kaya layer, I used a combi oven steamer set to 90C but the surface of the kaya layer became very pocked marked. I wonder if this is due to water dripping onto the kaya from the top of the oven and if there is anything I can do to protect the cake while steaming. Appreciate any tips and guidance.
160ml rice weighs 128g. You can protect the top with some aluminium foil. Hope that helps
Hello Dr Tay
Thank you for inspiring us to attempt an exceptional kueh salat.
I’ve posted a photo of my kueh salat. I have 2 questions:
1. I’ve covered the pan with aluminum foil with air holes, AND a cloth on top of it supported by a steam grill. But the surface is still not smooth. Is it the water droplets from condensation or the air bubbles surfacing as you mentioned from the rice layer?
2. As you can see, my cutting is far from precise. Can you recommend a ‘cake cutter’ as you mentioned in your additional notes?
P.S. I am using a combi-oven that has a steamer, convection, grill etc, so I can’t wrap the ‘cover’ in towel to absorb the steam condensed water droplets, unlike the stove type steamers (or kwali with water)…
Hi Gerard, it looks like you had droplets of water drop onto the top of the kueh salat. Instead of aluminium, maybe, just leave it out.
Hi Dr Leslie, I’ve followed your recipe almost over 20 times. It’s perfect with the reduced sugar you recommended. However I’m facing the condensation problem. I’ve tried to cover the steamer lid with foil and the lid is ajar. It still has water on the kueh.
Do you have any suggestions? Should I try a towel or change the lid to a steamer basket dim sum kind. The taste is excellent but I haven’t managed to have a totally smooth surface.
Traditionally, they use a cover the shape of a cone so that the water drips down the side. You can try covering with towel to prevent condensation.
Oh like tutu kuehs… Make sense to use a cone and maybe the higher the better. Will try.
Any good brand of coconut milk? I tried Kara and the Aroy D, Chaokrah, Heng Guan in the fridge ones. In the end I don’t get that strong fragrant coconut taste like chalk farm or Harrianns. Is there a tip or do I really need to use fresh wet market coconut milk if I want to achieve that coconut fragrance, short of using coconut essence.