


I am very excited to share with you my traditional Hainanese kaya recipe! This is something which I have been researching for the past four months and I finally manged to re-create a kaya which I have heard about from folks from the pioneer generation!
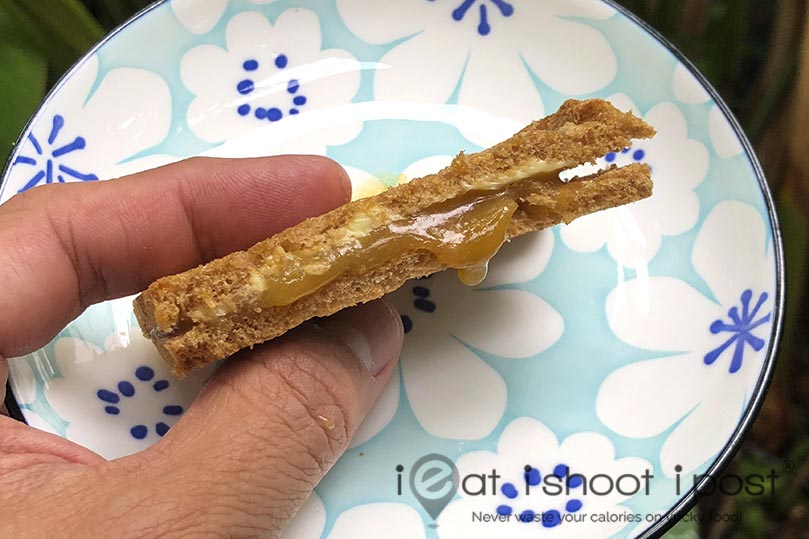
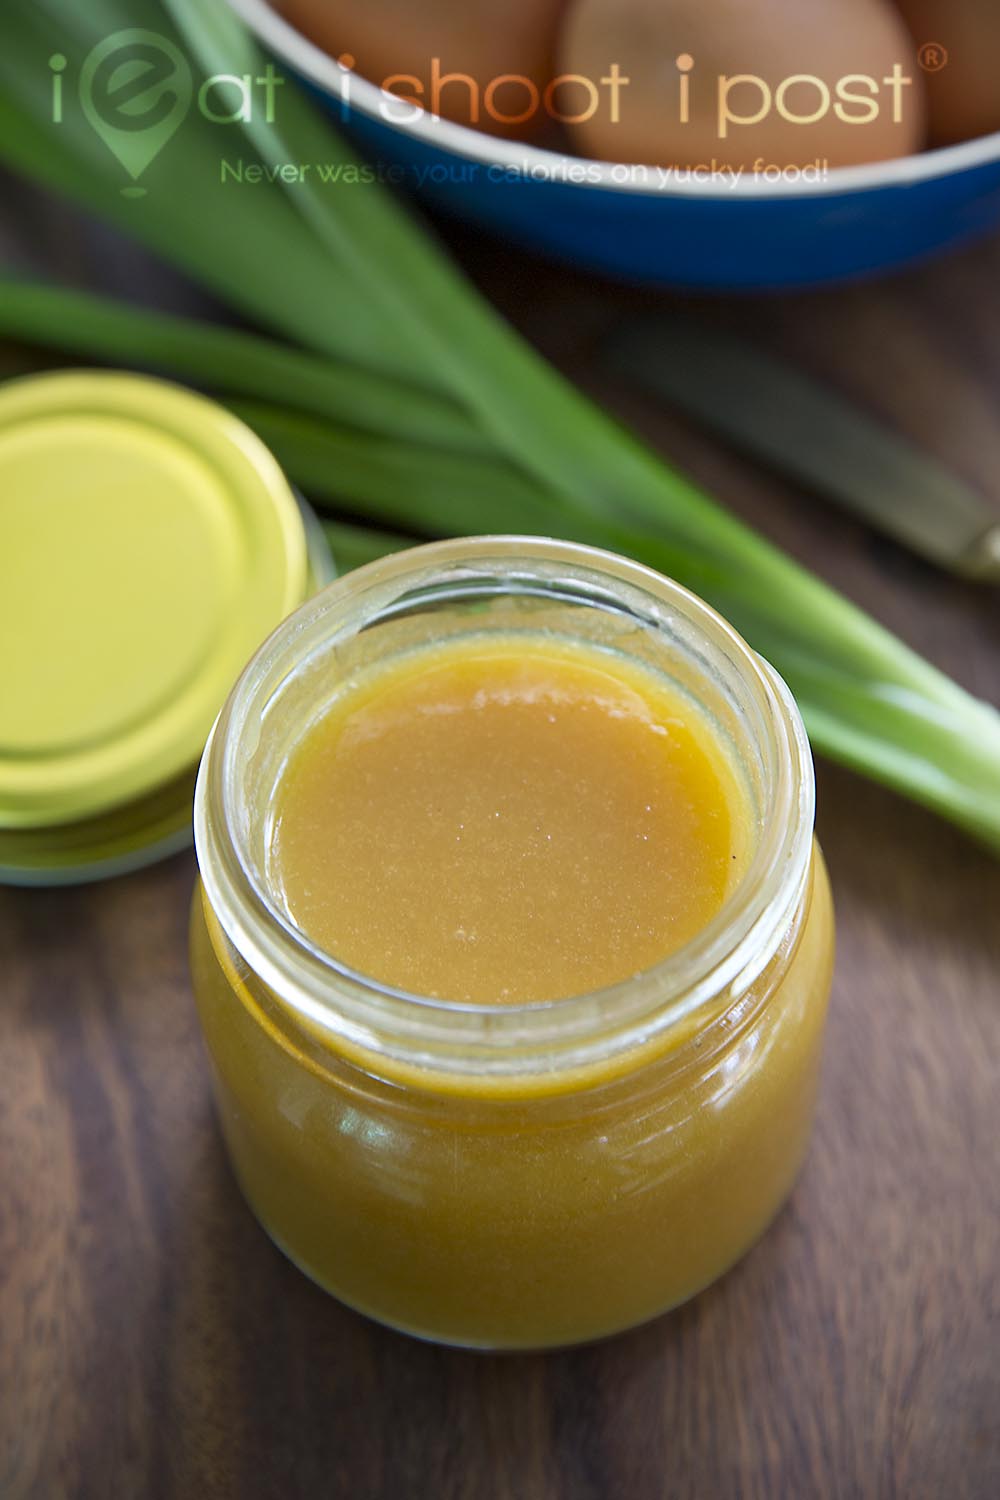
So, what makes this kaya different from all the other kaya recipes available on the internet? Well, for one, it is a Hainanese style kaya which has caramel added to it. So it is brown, not green like the Nonya style kaya. The texture is smooth and silky rather than pastey or lumpy, and the predominant flavour is that of coconut and caramel instead of eggs and pandan.
Traditional Recipe, New Method
I have also worked out a new technique of cooking the kaya without having to spend long hours of continuous stirring which the older folks insist is the only way to make good kaya. I found that once the kaya has been cooked to the right consistency, you can simply pour it into a jar and place it in a rice cooker to complete the cooking process! The kaya will continue to “mature” as the sugars slowly caramelize over time and the texture will not be affected. This technique means that you can control the amount of caramelization without any effort at all with no compromise to the flavour or texture of the final product!
Traditional Hainanese Kaya Epiphany
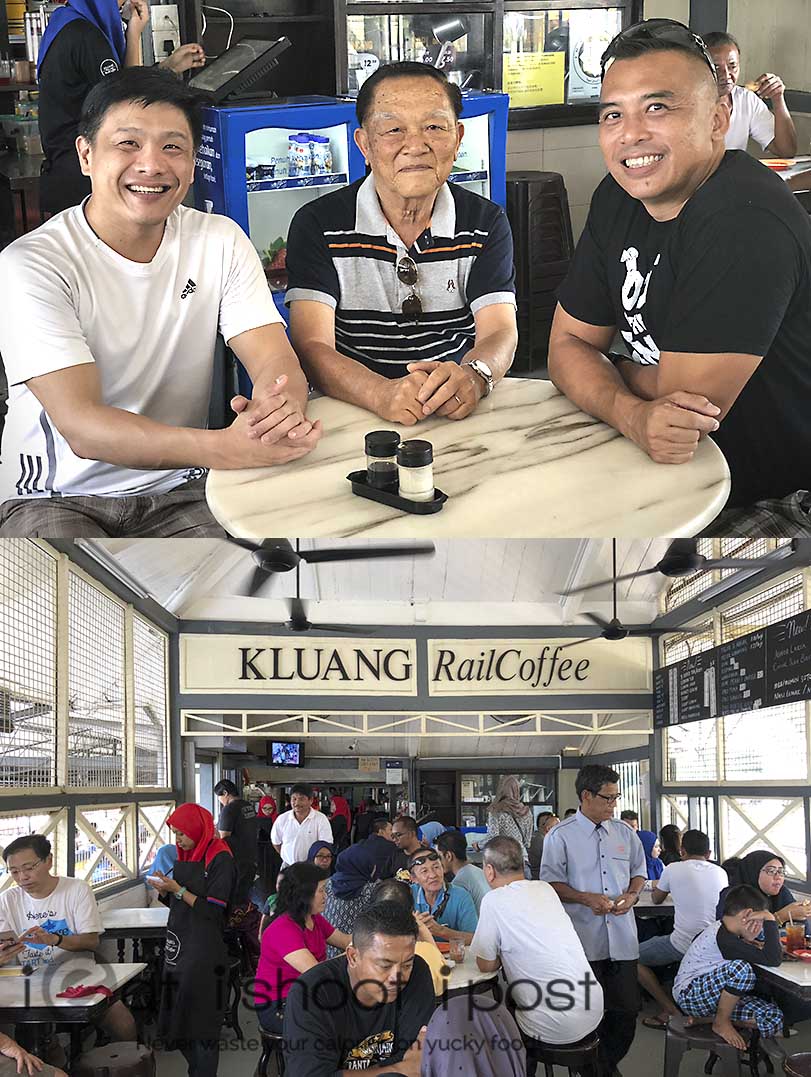
I started this journey after I experienced my kaya epiphany at Rail Coffee in Kluang. There, I came across a kaya which was very different from the type we get here in Singapore. It was dark brown and much thinner than the kaya we have here. I was fortunate enough to speak to Mr Lim Heng Hoo, 80, whose father had started the cafe in 1938 after arriving from Hainan island.
It was then, that I started to understand what a traditional Hainanese kaya is supposed to be like. Kaya, as Mr Lim tells me, is not supposed to be lumpy. Lumpy kaya is overcooked. Kaya should be smooth and silky. It should be such that it oozes out of your toast when you eat it. Kaya is not supposed to be eggy. Eggy kaya is kaya that hasn’t been cooked long enough. Kaya is also called coconut jam and so the predominant flavour should be that of coconut.
In the old days, the whole family was involved in cooking kaya! All the cousins would take turns in stirring the pot and get reprimanded if they don’t do it properly! The first stage in kaya making is to cook the eggs and sugar first until it thickens slightly. Then, the coconut milk is added and finally, just before it is done, caramel is added. The whole process requires a low and slow fire and hours of cooking to turn eggs, coconut and sugar into a smooth and silky, yet deep and bold kaya!
That meeting completely shattered my kaya paradigm. I have eaten lumpy, yellow green kaya at many places and it never occurred to me that kaya wasn’t meant to be like that. There is a nonya version which is green in colour, but even then it shouldn’t be eggy and lumpy. Eggy and lumpy kaya is simply poorly cooked kaya!
So that got me researching for a traditional kaya recipe which requires the eggs and sugar to be cooked first. This recipe isn’t readily available but having spoken to several elderly folks, I became convinced that this is the way kaya was cooked in the past as they all tell me the same thing!
The Breakthrough
After many failed attempts, I finally met Irene Yip, 68, a culinary instructor in traditional local dishes. Irene shared with me her recipe which she learnt from the “King of kaya” at Tekka market. What I learnt from her is the proportion of eggs, sugar and coconut cream is simply 1:1:1 which makes it very easy to scale. The eggs and sugar need to be cooked for 25mins first and once the coconut is added, you need to cook it for another 35mins. The minimum cooking time is 1 hour. Anything less and the kaya may turn watery in the fridge. She also said she would steam the kaya for another hour to deepen the colour and flavour.
Those tips were the breakthrough I needed. But I needed to know the science behind it and so I started to measure the temperature of the kaya as it cooks. Since the coagulation temperature of egg whites and yolks are 80°C and 70°C respectively. I decided that it is important that the kaya not to exceed 80°C in the cooking process. It turns out that that is temperature we are aiming for! Once the kaya reaches 80°C, it will start to thicken the longer you hold it at that temperature. If you lower the temperature, the kaya will stop thickening. If the temperature goes higher than 80°C, the kaya will start turning lumpy.
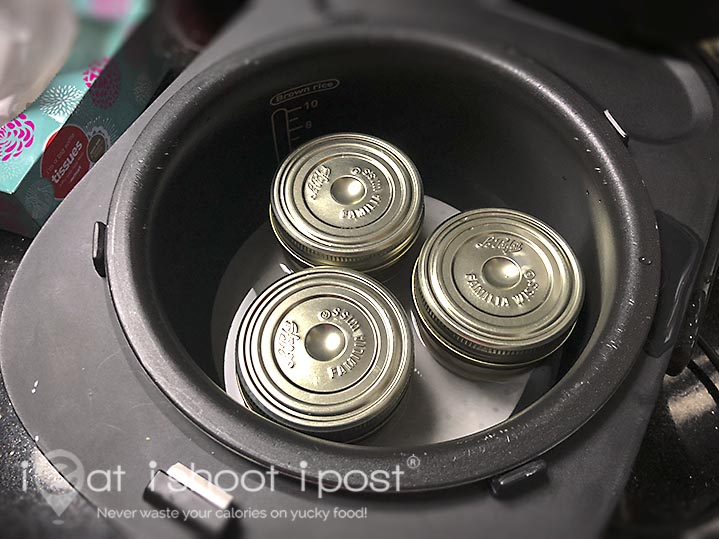
The other breakthrough is that once you get the texture you want, you can essentially deepen the colour by simply cooking it at a temperature lower than 80°C without needing to stir the kaya! That was when the rice cooker idea came about. The “keep warm” function of the rice cooker keeps the temperature around 65°C. I have used to rice cooker “keep warm” function to make black garlic before, so I know that sugars will caramelize at this temperature over time. I tried it and it worked! I even kept one jar in the cooker overnight and it turned into a rich dark toffee colour!

The longer the better?
So the question now is what is the optimum time to leave in the rice cooker? To answer this question, I made a batch of kaya and set aside one jar that is just cooked. The other three jars where placed in the rice cooker for a further 1, 2 and 3hrs (ie total cooking time of 2, 3 and 4 hrs. Then I did a kaya tasting with my cell group members to see what is their preference.
In general, the group was split between the 1 hr kaya and the 4hr kaya. The ones that like the 1 hr kaya are mainly the lady who enjoy the fragrance of the kaya while most of the men preferred the deep, bold caramel flavour of the 4 hr kaya! There were a few who went for 2hr kaya because of the balance between fragrance and flavour. My conclusion is that there really isn’t an optimal time to cook kaya because it depends on what you like. If you prefer a lighter, more fragrant kaya, you can just cook it for an hour. If you are after bolder flavours, you can leave it in the cooker for another 3 hours. Experiment and decide for yourself what works for you! But, if you are after the old school taste, then you should leave it in the cooker from anything from 1-5 hrs for the sugars to caramelize!
Recipe
The recipe is amazingly simple and easy to remember. Eggs, coconut cream and sugar in 1:1:1 proportion by weight. All you need to remember is to set aside 20% of the sugar to make the caramel.
NB: For the green Nonya version, just omit the caramel step.
Ingredients (Makes 4, 200ml jars )
A
Eggs 420g (6-7 eggs depending on size)
Coconut milk 420g (Start with 500g, and measure out 420g after cooking with pandan leaves)
Sugar 340g
Pandan leaves 6 leaves knotted
B (Omit for Green Nonya version and add the 80g sugar into group A)
Sugar 80g
Butter 20g
Method
1. Whisk eggs and sugar till smooth and strain
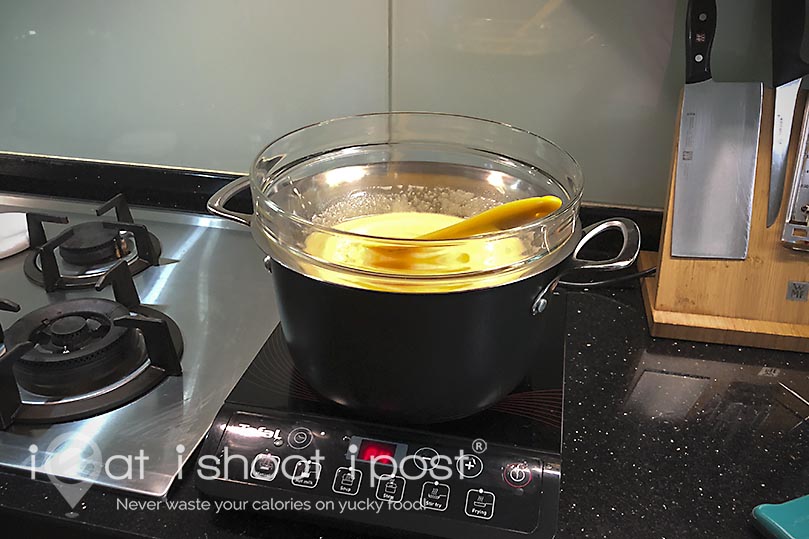
2. Place eggs in a bowl over boiling water and cook for 25mins or until the batter reaches 80°C. Stir occasionally in the initial stages of cooking and more constantly when the eggs start to thicken.
3. Place the pandan leaves in a separate pot and add the coconut milk. Bring it to a simmer and set aside while the eggs are cooking.
4. Strain the coconut milk. Measure out 420g and add this to the egg batter and cook for another 35mins or until the temperature reaches 80°C and the kaya reaches the consistency you want.
5. When the kaya is almost ready (around 45 mins), melt the remaining sugar and butter till caramelised and golden brown. Leave to cool a little and add to the kaya slowly. (omit this step if making Green Nonya Kaya)
6. Continue to stir continuously until the consistency is like pancake batter. (It should be runny not pastey!)
7. Fill the jar and cover with the cap. (don’t tighten)
7. Place in rice cooker with water up to 3/4 the height of the jar. Turn to “keep warm” mode and leave it for the next 1-3 hours. My preference is 1 hr.
Additional Notes
1. I like to use the hand blender to whisk the eggs because it is quicker, but you can do it with a normal whisk. The key is to break up the egg whites so that the mixture is smooth and even. If you don’t do this properly, you might get streaks of white in your kaya. You can just stir the eggs and sugar directly over the water bath, but I am just a bit OCD about these type of things.
2. I recommend cooking the kaya in a glass bowl over boiling water. I have used a metal bowl before and found that it is a little harder to control the heat as the temperature of the bowl is slightly higher. You will need to lower the temperature of the water bath to a gentle simmer if you use a metal bowl and keep stirring to make sure the eggs in contact with the bowl don’t thicken too quickly. A glass bowl over gently boiling water is easier to control.
3. You don’t really need to do anything at the start of the cooking process. You only stir to even out the temperature of the batter. The eggs will only start to thicken above 75°C ie around the 20min mark. That is when you need to start stirring continuously to make sure the eggs that are in contact with the bowl don’t get lumpy. The romantic idea of grandma stirring the pot continuously for 3 hrs is probably told by grandpas to convey the depth of their love for the family!
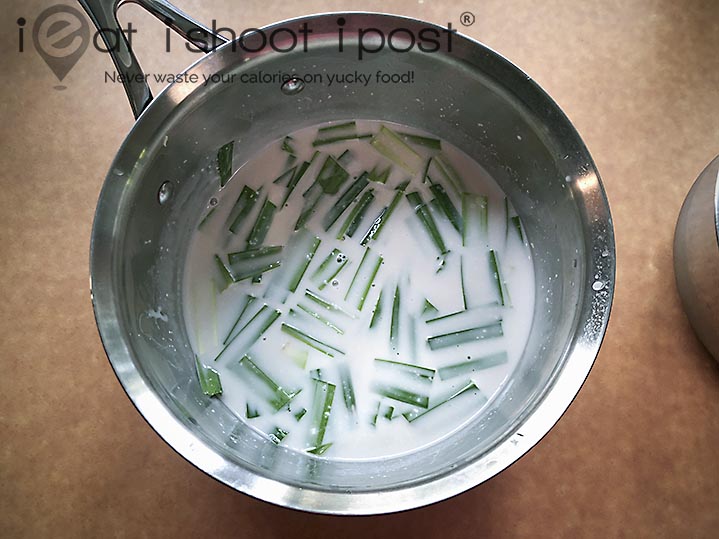
4. I like to steep the pandan leaves in the coconut milk first because I hate having the leaves in the pot while I am cooking the kaya. By cooking the pandan leaves in the coconut first, the flavour of the pandan is already infused into the coconut milk. Do not boil the coconut milk, just heat it up still it is steaming and leave the pandan leaves to steep. 10 mins is all you need. Then remove the pandan leaves and the coconut milk is ready. If you wish, you can add the coconut milk directly to the eggs at the 25min mark, then add the pandan leaves into the kaya at the 45 min mark.
5. For the coconut milk, if you are going to make the kaya for your future mother-in-law in the hopes of securing her daughter for life, then go down to Tekka market stall 178 and ask the man to give you the best, handpicked coconut and get him to remove the brown skin on the spot and shred it. If you use coconut that is shredded with the brown skin on, the kaya tends to turn a little grey. Using white coconut, you will get a nice golden colour. By doing this, you can wax lyrical about your effort in buying the best coconut, thereby showing the extent of your sincerity and future filial piety and chock up some points towards asking for her daughter’s hand in marriage!
If you are not wooing someone, then your next best option is to buy freshly shredded coconut from the market and squeeze it yourself. Make sure it is the first squeeze. No water should be added to the coconut milk. I have used the fresh coconut from the supermarket cold section before as well as the UHT version from the shelves. Frankly, they all taste good and you will not be able to tell unless you taste them side by side! So for a start, just go for the easiest option!

6. Start melting the caramel at the 45 min mark. Once it darkens, let it cool a little and add it to the kaya. Don’t overcook the caramel or else it will harden you will end up with bits of candy in the kaya! (Guess how I know?) Add the caramel gradually and stir continuously or else the high temperature of the caramel will turn the kaya lumpy. Some people like to use gula melaka, but I think it will spoil the flavour of the coconut jam. If you cook it long enough, the sugars in the coconut milk will naturally taste a little like gula melaka.
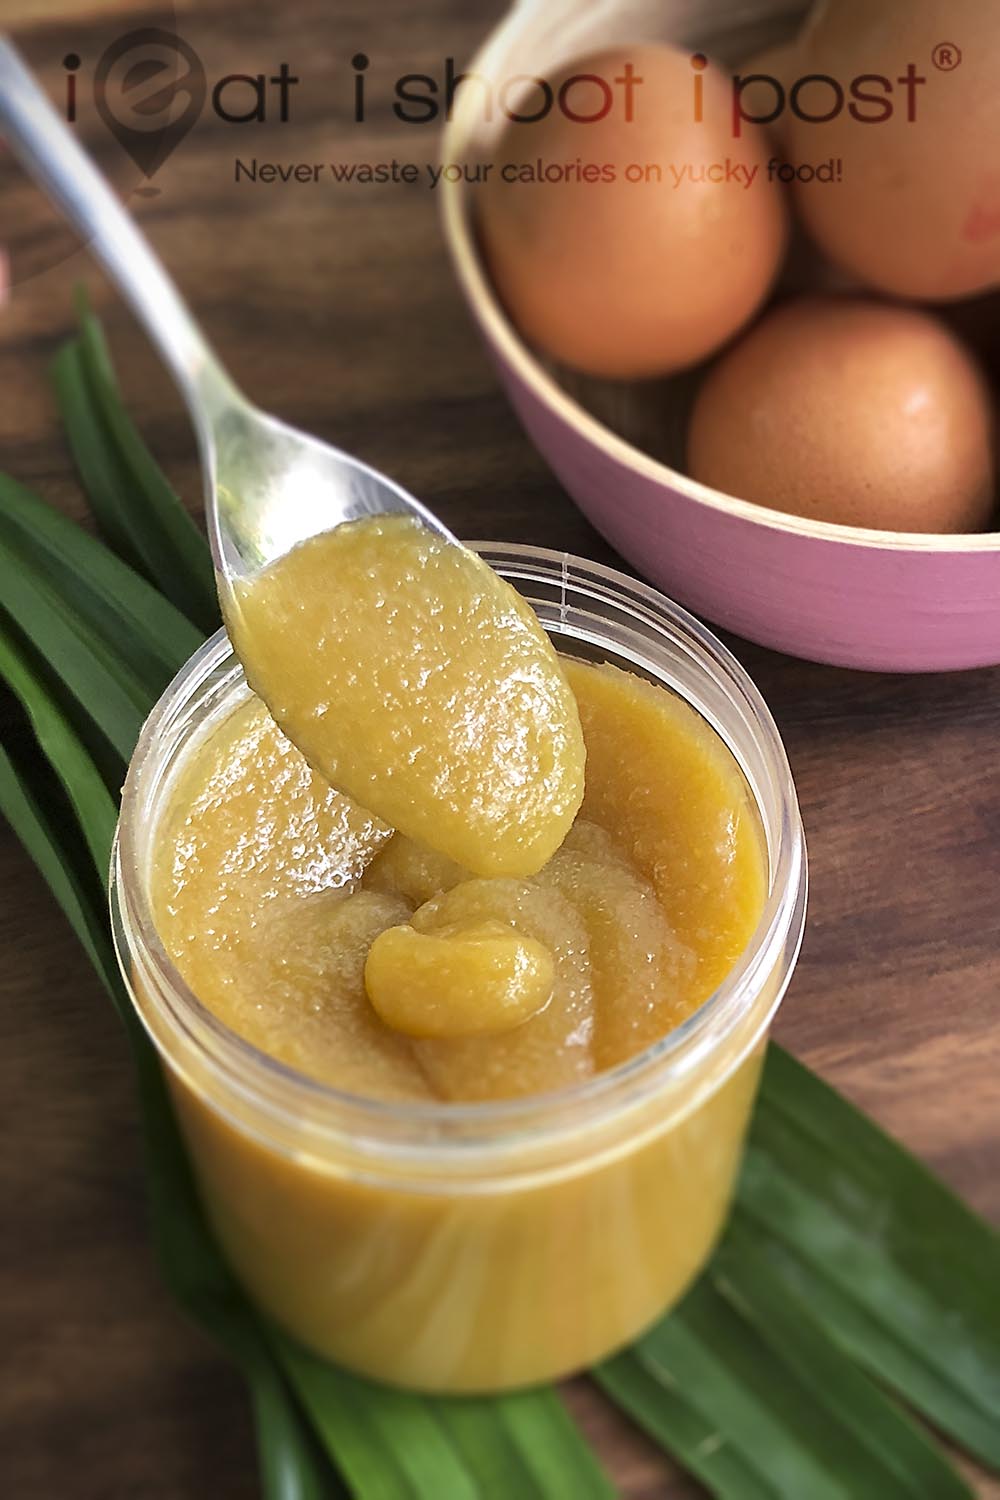
7. Most people like their kaya thick. I used to think this way until I had the kaya at Rail Coffee. Now I am convinced that kaya has to be more runny. When you are cooking it, always stop before you to get to the required thickness because it will thicken further in the fridge. Coconut cream, like butter, is a saturated fat which will turn solid in the fridge. So the texture you want is the texture when it is just cooked. That is the texture that you will feel in your mouth when the kaya warms up to body temperature. Kaya should be smooth, slightly grainy and very spreadable, like room temperature butter. It should ooze out of your toast when you gently press on it and drip onto your hands so that you can gleefully lick it off! This is the kaya that requires skill to make. This is the kaya that all your friends will go “Ohhhh, kaya should be like this!” This is the kaya that grandpa and grandma used to enjoy! This is traditional Hainanese kaya.
Conclusion
Please be part of the kaya revolution and help share this recipe with your friends! It is my hope that it will inspire more coffeeshop and cafe owners to start making their own kaya so that we can all have seriously good, traditional Hainanese kaya to enjoy when we order our kaya toast!
Check out our dessert recipes:
Leslie’s Kueh Salat Recipe: Silky Restaurant Quality Kueh
Leslie’s Simplest Butter Cake Recipe
Fluffy Buttermilk Pancake Recipe
Japanese Durian Cheesecake
Ieat’s Overnight Yeasted Waffle Recipe
Christmas Tree Kaya French Toast Recipe
Leslie’s Traditional Hainanese kaya recipe

For the eggs of 420g, is it the weight of eggs out of shell or egg weight with the shell?
Egg measurements by weight are always referring to the edible parts only, the white and yolk.
Without shell
kara coconut milk?
Can, but freshly squeezed coconut milk will be better. I have tried both.
Ok will try using Sous Vide instead of rice cooker. Hope it turns out well. Thanks
It should!
Instead of popping it in the rice cooker, do you think it’ll work by putting the jars in a water bath and in the oven at 65C for an hour?
Oh sure! In that case you can do it at 75C.
Hi Dr Tay
Thanks for the article and video.
Do you know the origin of kaya? Was it brought here by the hainanese?
I think the Hainanese probably learnt and modified it from the Peranakans
Thanks…sounds logical…just curious why the Peranakan have no kaya based Kueh (correct me if I’m wrong)
Yes, its called pulut tai tai. Kaya on a base of glutinous rice.
Thanks ?
I think the story goes like this : Hainanese working as cooks for Brits learnt jam prep amongst many other things and they in turn turned egg & coconut milk into the delicious kaya we have the privilege to taste today
Les, looks amazing! *2 thumbs up* 🙂 As a (half) Hainanese, I would really love to try out your well-researched recipe! Too bad it is hard for me to find pandan leaves here in Italy so can’t make it myself… 🙁
You can actually leave the pandan out. Use some vanilla!
Can leave out the pandan leaves and get Hainanaese style kaya
Can I use coconut cream instead of milk? What differences would it make?
Sure. It should be quite similar
Thank you for the detailed instructions. I would like to use your recipe on my Thermomix to cook the kaya. Have u tried it.
Yes, it works very well.
I would like to make it in large badge, 2 or 3 times of the recipe, Will the stirring time be double or triple as well?
Hi, I think the cooking time will be slightly longer but not in proportion to the volume of kaya.
hi! so if i wanted the kaya lumpy, would i just cook the kaya longer? i’m looking for a lumpy kaya recipe (to put in a pandan swiss roll like the rich & good cake shop) but it’s so hard to find!
If you want it lumpy, it is very easy. Just cook at higher temperature. It will cook really fast.
This looks great! I notice some people blend the pandan leaves with a bit of water and then strain the leaves to make a pandan “essence” instead of steeping the leaves directly. Do you think this affects the flavor or is that method used mainly for the green coloring?
It does affect the flavour. The blending method results in a grassy flavour. Whereas when you steep the leaves, the flavour is more mellow.
I discovered your posts which searching for Kek Sarang Semut.
Decided to try your kaya recipe and method yesterday, at 10.00pm to be exact. Boy, it was mistake no 2?. Am typing this while waiting to see if there would be any colour change with one hour constant geat at setting of 60 on the induction.
I used the metal bowl, since one of our pots has it as an accessory. Mindful of your advise, I used a whisk to stir the paste, scraping the side of the bowl. I started with the induction setting at 80. After about 15 minutes, feeling impatient,, the setting was switched back forth, between 80 & 100 , and the paste ended up less runny. That was mistake no 3.
Tasting the kaya at around 20 mins, finding it sweet, I reduced the sugar for the caramel and well, it did not change tge colour much. Mistake no 4.
Then, I realised, mistake no 1. Don’t take the word of the person selling the coconut milk that only “white” coconut grate was used. They, used the same machine to press both white or without the brown.
That said, I sm happy with the outcome of the first try.
It also made me aware of how much effort you had put in to make sure that we get it right by the second time, if not the first
Thank you so much.?
YOu are welcome! try try again!
Hi Dr, If I have only 1 stove and cannot prepare the coconut milk and caramelised sugar concurrently with the egg batter, what would you recommend as a sequence?
I was thinking of preparing the Pandan infused coconut milk first, set It aside, then cook the egg batter and add the coconut milk when total cooking time reaches 25min, At 45 min, set the batter aside and prepare the caramelised sugar, then add that to the egg batter and continue cooking for the remaining 15 min?
That will work too.
I used to follow my mother’s recipe to make kaya years ago and the proportion is 1:1:1 in volume. The kaya would turn dark brown on its own without using caramel. This was a result of kaya left to steam for some hours.
Thanks for sharing.
Hi! May I know how long can I keep this in the fridge?
2 weeks should be okay.
You can actually keep it in the fridge for months! We often do that when our hainanese grandma made her kaya.
Well, its not something I would advise to do on a public platform.
Hello! What’s the shelf life of Kaya? Can I store it at room temperature or it should be put to a refrigerator after it cools off?
I would advise you to keep in the the fridge once it is cooled.
How long can it be kept unrefrigerated?
That is a tough one. I actually don’t advise to keep it unrefrigerated.
Thanks for sharing the Kaya recipe. Just made one batch yesterday and it turned out great! My Kaya looks dark green as I used too much Gula malacca and Pandan juice . Apart from that the taste is superb! Will try again and share with my friends in Hong Kong.
For those who can’t find fresh coconut juice in your country, you may substitute it with powdered coconut mix with water and Pandan juice (if you have grown one in your garden) the result is just the same.
Thanks for your tip!
Glad you like it!
I think 2 weeks is quite safe.
Just want to say many thanks for sharing the cooking technique of putting the bottle kaya in the water bath. I use yr ratio except i grind the pandan leaves in the coconut milk and it came out superb! What was a plain, sweet jam became aromatic kaya. Thanks Dr Tay!
Glad you liked the recipe!
I love Kaya but due to health reasons, I have to reduce sugar intake.
Can I reduce sugar for this recipe? Will reducing sugar affect the consistency?
Yes, you can reduce it a bit. I haven’t tried but I think 20% should be ok.
Thank you for sharing on your kaya receipe ,
Can I use packet coconut cream instead of fresh coconut milk ?
Yes, you can!
Hi! Do you have any tips for squeezing shredded coconut without adding water? All the recipes online say to add water.
You can try to microwave the shredded coconut to warm it up. It will make it easier to squeeze. But don’t throw the rest. You should add warm water and get a 2nd round of coconut milk.
Hello
May i ask if the kaya can be recook cz it is still runny after cooling down?
Sure, but don’t overdo it or it’ll turn lumpy
Thank you for the recipe. I’m wondering if I can skip the rice cooker step and stop once it’s jarred? Or if it’s important, can I continue stirring for an hour on the stove?
Thanks!
Yes, you don’t need the rice cooker step. You don’t need to stir continuously over the stove, just occasionally and more towards the end when the temp hits 80C
Thank you for sharing your recipe! I’m Kayaojisan, working to introduce kaya jam in Japan. To help my pandan plants survive the cold Japanese winter, I’m growing them in a greenhouse with a plant heater.
This time, I overcooked the caramel a little too much, so I’ll try the rice cooker aging method next time. It was my first time using a recipe where the eggs are warmed first before adding the coconut milk, and I was amazed at how smooth the texture turned out.
I truly appreciate your insights—thank you!
Oh wow! Thanks for sharing. I am so glad you are promoting our kaya in Japan!