 This Recipe was brought to you by Mayer, the Kitchen Speclialist
Exclusive offer for ieatishootipost readers at the end of the post

ieat’s Chiffon Tin Crispy Roast Chicken
There are many recipes for Roast Chicken on the internet, but I haven’t come across one which deals with the Chinese Style Crispy Roast Chicken which I love to eat at Cantonese restaurants. So I hope this recipe will be useful for anyone who wants to make this yummy dish at home. Typically, the roast chicken that you buy outside is not really roasted. The whole chicken is actually deep fried in oil. Doing this at home is not practical as there is a lot of wastage. With this recipe, the chicken is first roasted at a low temperature to ensure that the meat does not lose its juices and then the skin is browned to give it that crispy bronzed skin.
My new Ariston OpenSpace Oven
I have just swapped my old oven for a brand new Ariston Openspace oven and so I have been doing a few kitchen experiments with my new gadget. Essentially the oven gives me a 20% increase in the internal space while the external dimension is still the same. That means that I simply swapped my standard 58 litre oven for a 70 litre one without having to do any alteration to my Kitchen furniture. The oven can be divided into two separate compartments, a smaller 20 litre on top where you can bake and grill and a larger 48 litre compartment on the bottom for baking. Both compartments have their own controls so you can actually grill something in the top compartment while baking another item in the bottom. With this flexibility, I was able to roast a chicken in the bottom compartment and bake some cornbread at the top. The individual controls meant that I can vary the temperature when I am roasting the chicken while keeping a constant temperature for the cornbread! The oven can be converted to a single 70 litre oven by simply removing the divider, giving one big space that can be used to roast a Turkey or a Duck vertically if you wish or simply to bake enough muffins to feed a small school of hungry kids!
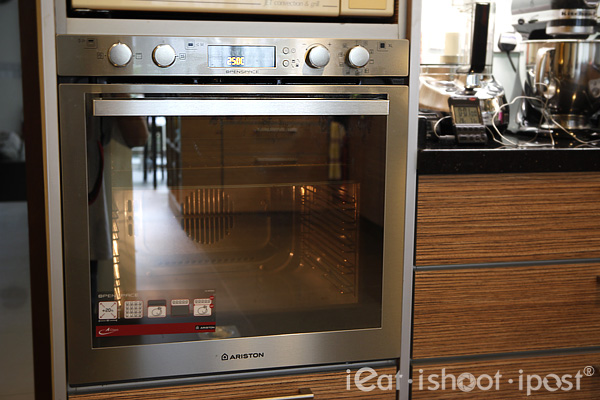
Ariston’s Openspace Oven gives me 20% more space compared to my old oven
Cooking Temperature for Chicken
The recommendation for cooking whole chicken as stated by the USDA is 85 degrees Celsius. As with all government recommendations, it is done to give a wide margin of error. (Singlish: Kia Su). Meat proteins denature at 55-65 degrees. ie once your meat reaches 65 degrees it is essentially cooked. But with chicken the concern is Salmonella. Salmonella is killed at 55 degrees, but you have to hold that temperature for a while. The consensus is to cook your meat to 65 degrees for 10 minutes or 70 degrees for 2 minutes. At these temperatures you essentially kill all the bacteria. But the trick is to ensure that the whole chicken is cooked to that temperature. Hence the USDA recomendations to totally annihilate the bacteria by cooking to 74 degrees for chicken pieces and 85 degrees for a whole chicken.
Aside from making sure that the Salmonella is killed, the right cooking temperature is also required for tender meat. It is recommended to cook the thighs to 85 degrees because you needed a higher temperature to break down the connective tissue in the thigh meat. But that is only applicable if you are using a real kampung or free range chicken. If you are using the normal battery hens, the thigh meat does not have enough connective tissue to be tough, so you don’t really need to cook it to 85 degrees. For the purpose of my roast chicken, I try to get an internal temperature of 70 degrees as it ensures that the meat is safe to eat and as long as you don’t hold it too long beyond that temperature, the chicken will be nice, juicy and safe to eat.
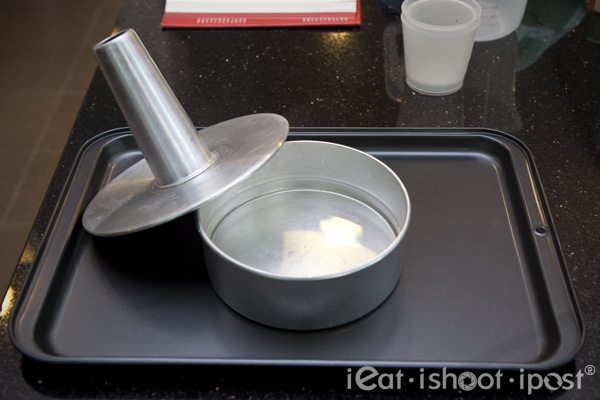
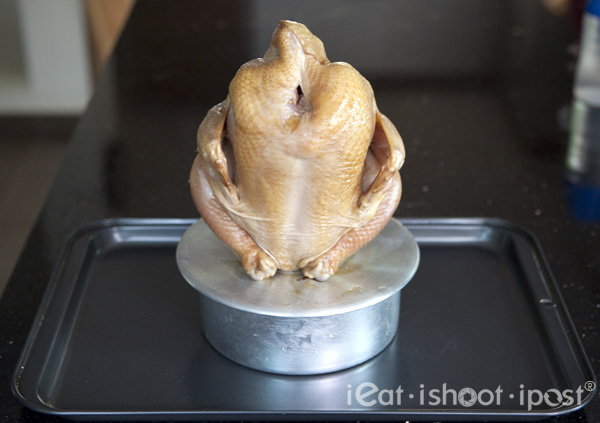
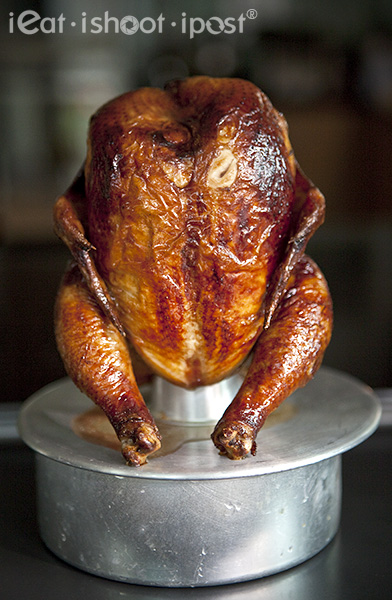
ieat’s Chiffon Tin Chicken Gadget: Boiling water is added just before placing the Chicken
I started researching for the best way to roast a chicken by watching Heston Blumenthal’s perfect roast chicken recipe. He defined a perfect roast chicken as having crispy skin with juicy and flavourful breast meat. In order to do this, first he got himself a Poularde de Bresse (expensive French chicken raised in five star resort), which he brines in a 8% salt solution. Next he parboils the chicken for 30 seconds to kill the bacteria and then dries the skin by placing in the fridge. The drying of the skin will ensure a crispy skin. He then cooks the chicken for 4 and a half hours at 60 degrees C, then browns the skin on a skillet before injected the breast meat with butter which has been flavoured by frying it with the cut wing tips. Now if you are trying to impress your wife on your first wedding anniversary, that’s fine. Otherwise, I think for practical home cooking, this is impractical and most of us will stumble at the Poularde de Bresse stage. So I wanted to do something practical but still employing some of Heston’s techniques to achieve a Crispy Roast Chicken like they serve in Cantonese restaurants.
A lot of people I spoke to experience a common problem with roast chicken and that is that the breast of the chicken gets too dry when it is cooked. This happens because the juices from within the muscle fibres of the breast meat starts to get squeezed out when it reaches 68 degrees Celsius. The typical way of roasting a chicken is to place the bird on the roasting tray and roast at 200 degrees for 40 – 60 minutes. The problem with this method is that at the beginning, the temperature outside the bird is 200 degrees, while the temperature in the cavity is 25 degrees. So the heat has to penetrate slowly through the chicken. By the time the inside of the chicken reaches 68 degrees , the outside has gone way beyond that temperature and so the breast meat is dry and unexciting . So the principle is to try to cook the chicken at a gentler temperature and minimize the temperature gradient between the outside and the inside of the chicken. You can of course achieve this simply by cutting the chicken in half and roasting it that way, but a whole roasted chicken is more sexy when you present it on the table.
The Chiffon Tin Gadget
I had initially wanted to try the beer can chicken cooking technique because I thought it was a great concept to have the cavity of the chicken cooked with the boiling beer. But I am not a beer drinker, so I looked in my cupboard and found that the inner tube of my chiffon cake tin worked even better than a beer can as it had a base for the chicken to rest on. Placing this over a small cake tin filled with boiling water from the kettle was a good way of keeping getting the cavity of the chicken to a temperature of 100 degrees C. (Boiling point of water)
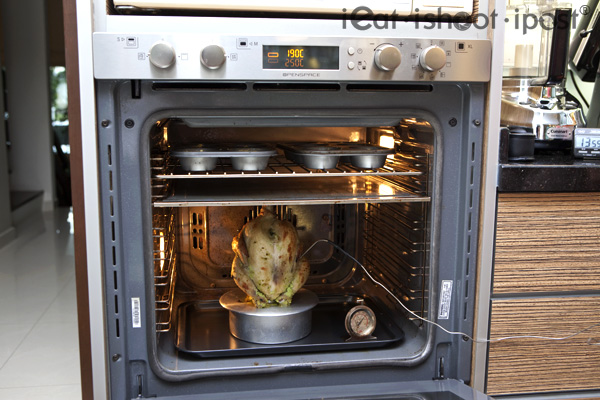
Baking Cornbread on top at different temperature while Roasting Chicken on bottom
With the Openspace oven, I have the flexibility to actually bake some cornbread at a different temperature while I am roasting the chicken. The two compartments have their own temperature control. So while I am roasting my chicken at 220 degrees, I was baking my cornbread at 190 degrees! (Note: The difference range is limited to 50 degrees) Plus if I was just roasting chicken, I actually save on electricity as I only use the bottom compartment. There is an insulator that divides the oven into two compartments. If you remove the insulator, then the whole oven can be used to say roast a whole turkey upright! All in all, I found the flexibility and the extra space very useful.
My Recipe for the Crispy Roast Chicken
Many chickens had to be sacrificed for the sake of this post and I always have to come up with new flavours for the chicken so that my kids don’t complain too much. There are many flavours which I experimented with and it is really up to you if you want to season the chicken with just salt and pepper and baste the chicken with butter or if you want to go the way of marinating it with satay spices. However, I wanted to post something that no one else has posted on the net, so I asked Francis from Cafe de Hong Kong for his fabulous Roast Chicken recipe. This is the crispy skinned bronzed chicken that I love to eat at chinese restaurants. Actually Roast Chicken is a misnomer since the chicken is actually deep fried. But not many of us would want to heat up a whole pot of oil just to deep fry one chicken, so here is my modified home version:
1. Brining the Chicken (Optional Step)
This step is optional for chickens but essential for turkeys. Heston brines his chicken in a 8% salt solution ie 80g salt per litre of water for 4 hours. Brining will make the chicken more juicy and introduce some taste into the meat. I have tried brining but found that the extra effort is not really worth the trouble. However, I like that slightly salty flavour in my chicken, so what I do now is to use a solution made from 1/2 cup Soy Sauce and 1/2 cup water as the brining solution and marinade the whole chicken in a sealable plastic bag overnight with all the air evacuated so that the whole chicken is in contact with the solution. Try to use a good soy sauce like Kikkoman Special Fragrance Soy Sauce as it give it better flavour. I find that brining this way gives it that juiciness and flavour but doesn’t take up too much space in the fridge. If you wish, you can also add some coriander root to give it a nice aroma.
2. Preparing the skin and marinating the chicken
This particular step is the important step if you wish to get that golden brown skin that you see in Chinese restaurants. After the optional brining step, wash the chicken and then parboil it for half a minute and cool it in cold water. Repeat this step again and then pat dry. Season the cavity fo the chicken with 1 tbl salt, 2 teaspoon of white pepper and a pinch of 5 spice powder.
Now you need to make the browning solution. In a pot, mix 3 tbl white vinegar, 1 tbl black vinegar, 1 tbl water and 1 tbl malt sugar. (You can find this in the supermarket or just use honey to substitute) Bring the solution to a boil and let it cool. Next apply this solution over the whole chicken and let it air dry for at least 3 hours or overnight in the fridge loosely covered with baking paper.
3. Cooking the chicken
Option A. 100 degree Chicken 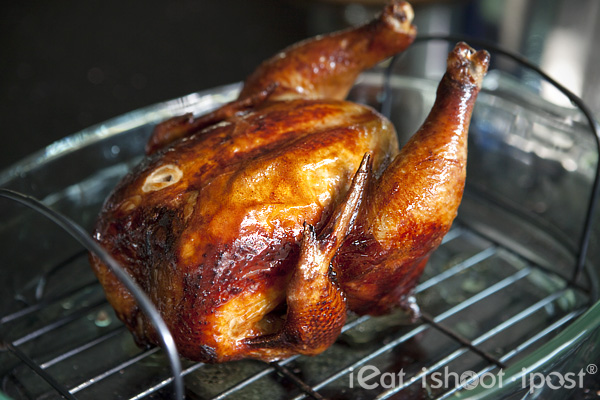
The 100 degree Chicken: Juicy on the inside, crispy bronzed skin on the outside
With my chiffon tin gadget, I experimented with different cooking temperatures and cooking times. The key is to cook the chicken to 70 degrees and there are various ways to do this. If you are the patient type. You should go low and slow by cooking the chicken just below 100 degrees. This is the temperature that they poach chicken in chicken rice. The chicken cooks gently and the meat is very juicy and tender. But there is one problem and that is that the skin does not brown. In order for the skin to start browning, the Maillard reaction has to occur and you need temperatures in excess of 120 degrees before that happens. You also need a the temperature to reach 170 degrees in order for the sugars to caramelize. I have tried cooking the chicken the normal way in a 100 degree oven and it took forever to cook. But with the chiffon tin, the chicken will be fully cooked in an 1 hour. This achieves almost the same result as Heston’s chicken which was cooked at 60 degrees for four and a half hours! (His chicken is also bigger but I don’t know the timing for a 1.6kg chicken)
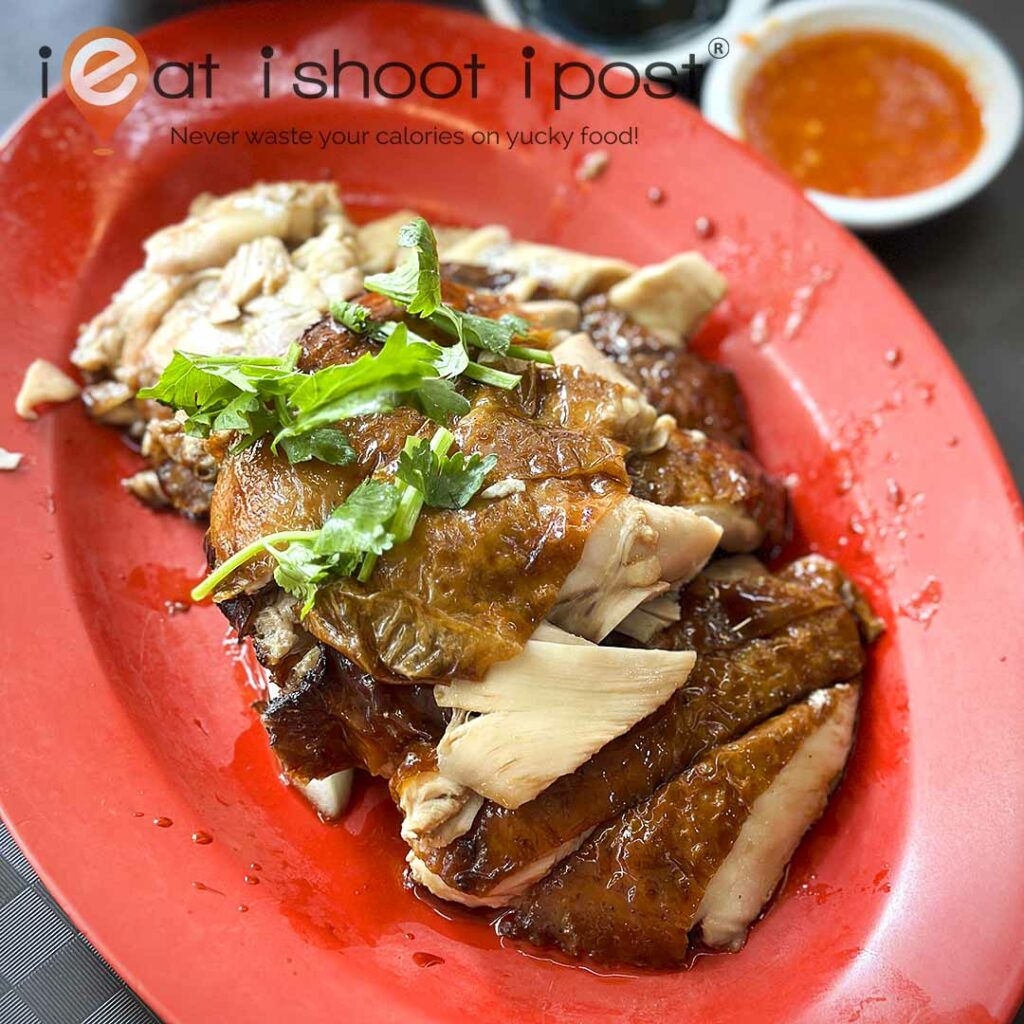
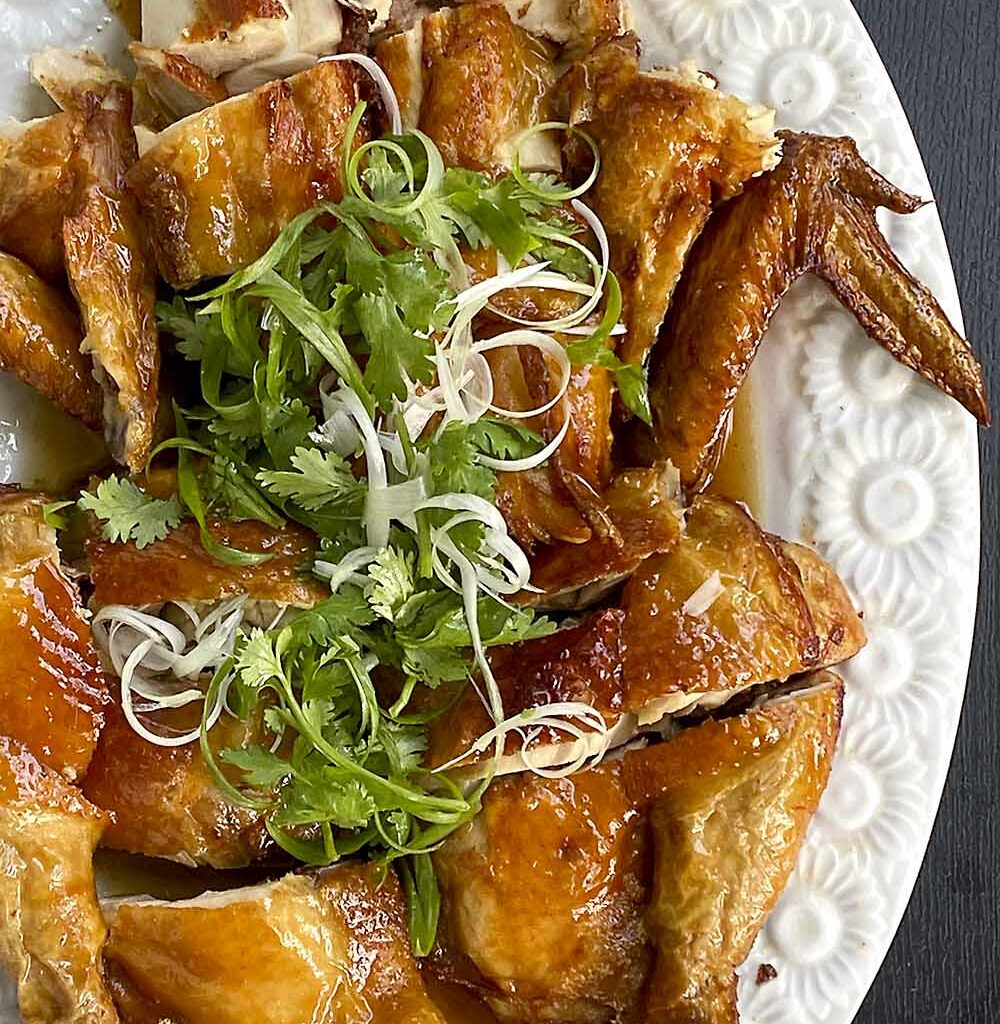
Once the chicken is cooked to 70 degrees, remove it from the oven and let it rest and drain of its juices. (about 15 mins or longer) The skin should now be slightly wrinkly, pale and dry. Now heat up one inch of vegetable oil in a wok and shallow fry the chicken in the hot oil, turning the chicken in quarter turns until the whole chicken turns into a crispy bronze colour. Chop up the chicken and serve with a mixture of pepper and salt.
Option B. 200 degree Chicken 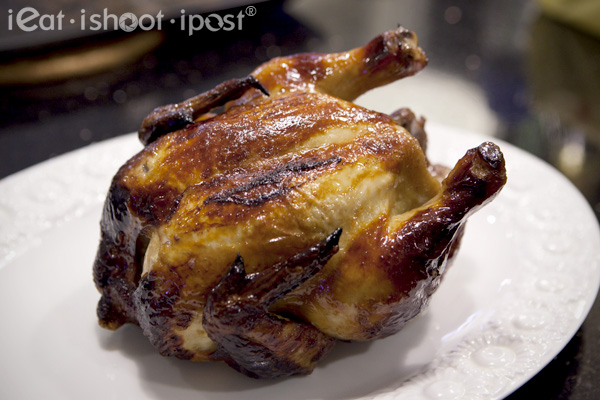
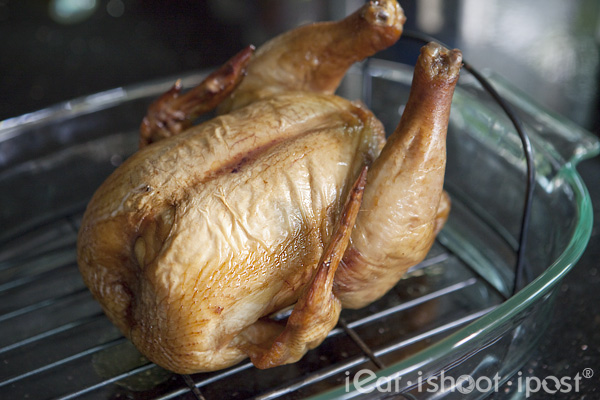
The 200 degree Chicken: Simple and Quick way to roast the chicken
Now, I know that most Singaporeans are very busy, so cooking chicken using Option A might not be practical. So here is a simpler method. After prepping the skin, pop the whole chicken in a 200 degrees oven. The chicken will only take 35 minutes to cook through and the flesh will reach a temperature of 70 degrees. (Start with chicken at room temperature) The skin will also be browned although it is not quite as attractive as the chicken in Option A. Just make sure you remove the chicken quickly as it can quickly become dry. The skin will not be as nice, crisp and evenly browned as the first method, but it sure saves a lot of time and effort.
Note:
1. Whatever method you use, make sure you rest the chicken for at least 15 minutes before cutting it up as it will allow the juices to be reabsorbed into the meat.
2. An instant read meat thermometer is an extremely useful device. The cooking times I publish here is based on my Ariston Openspace oven and you may need to adjust the timings to suit your own home oven. The timing is based on the standard 1.6kg chicken you buy from the supermarkets. So if you have bigger chickens, you would need to adjust the timing accordingly. The most precise way of doing this is with a meat thermometer! Definitely a good investment!

My cornbread baked in the smaller compartment of the oven
Now, while my chicken is roasting in the bottom compartment, I can still use the upper compartment to grill or bake and I have done a few things from baking cornbread to potato dauphinoise. If you are interested in cornbread, I use the one by Mark Bittman (lighter version) which can be found here.
Conclusion
My Roast Chicken is still far from perfect but I am quite pleased with the Chiffon Tin roasting technique as it helps to cut cooking time and prevents the chicken from drying out. Do give it a go and share some of your recipes here with the rest of our readers!
Print out the coupon and enjoy 20% off the Ariston Openspace Oven (The one featured in this post) plus a free KitchenAid Cookbook worth $69 and 2 baking classes. Offer valid till 31 Jan 2011. Happy Roasting!


