

My Sio Bak Recipe
I managed to pick up a few more tips in the last 3 years and have updated the recipe for a juicier, more flavourful sio bak! It’s one of those things that is really worth doing at home as it is relatively easy and you are sure to get a few “wows” and “oohs” which is really satisfying!
So, today I present to you iEat’s Chinese Roast Pork, Siu Yuk, Sio Bak Recipe II!
Here is the latest video (published 16 Jul 2020) showing you all the steps
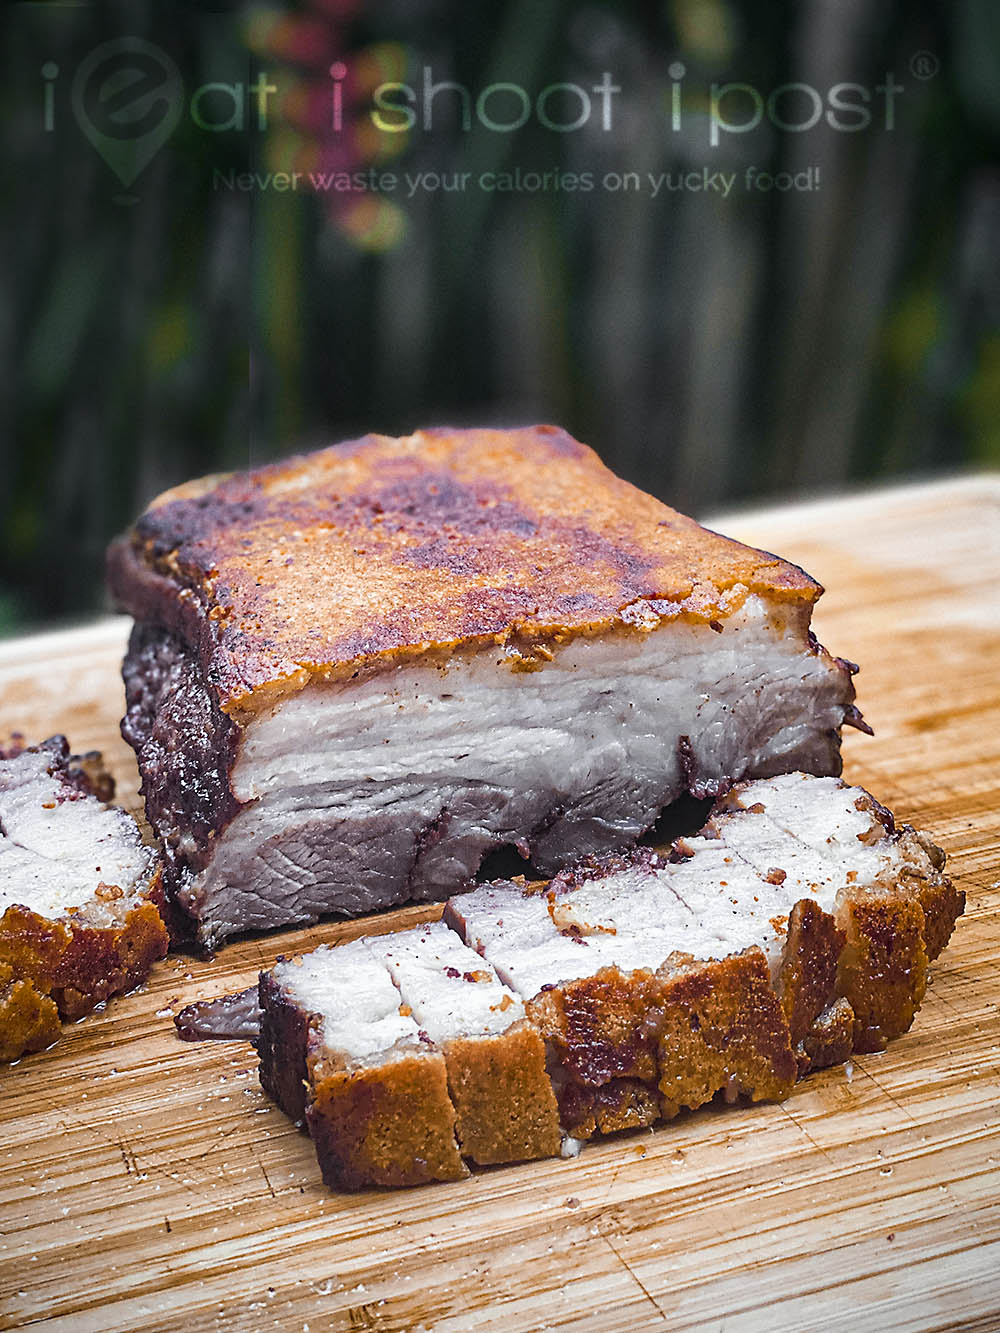
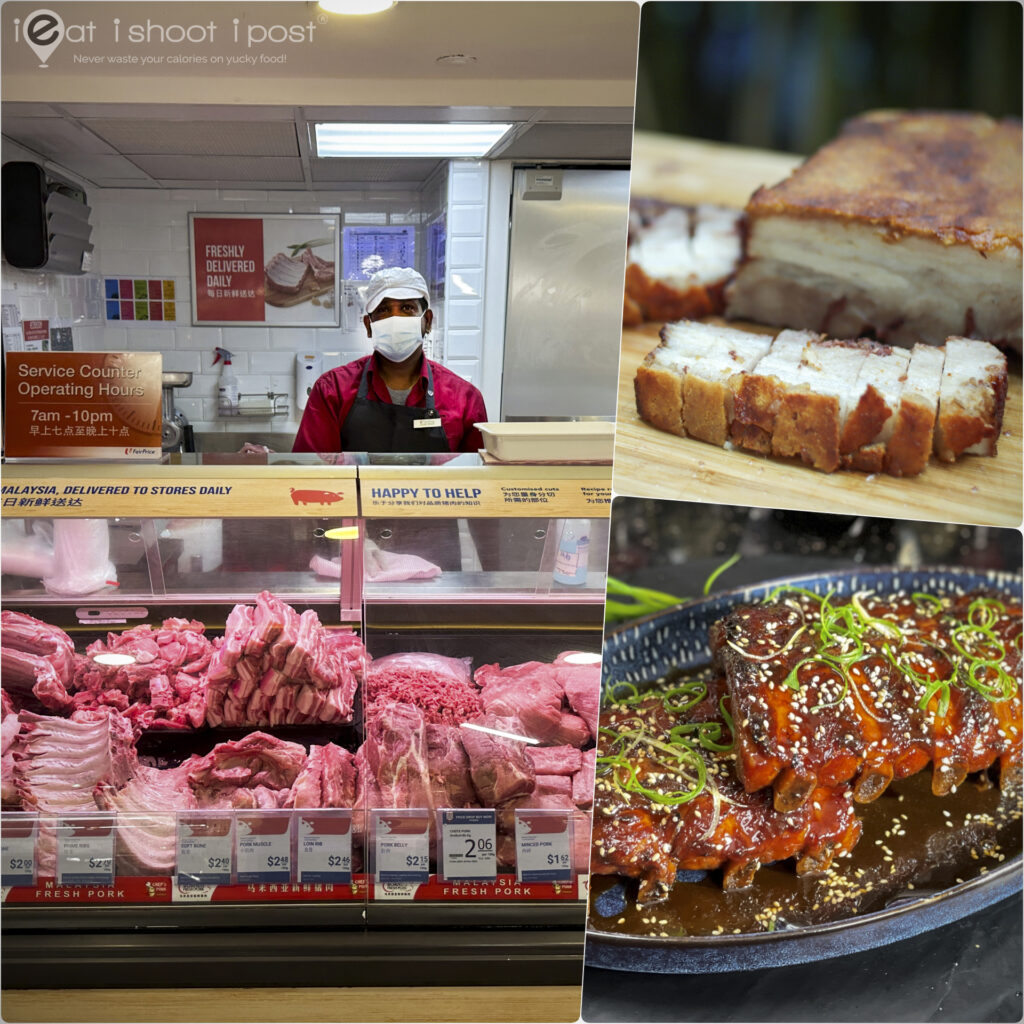
Chinese roast pork is something you can easily do at home. My last recipe was published in 2011 and since then I have refined the method to produce a skin that is even more crisp! The key to a shatteringly crisp rind is a two-part process where the skin is roasted till it is charred, then the top layer is scraped off. What results is a layer of the epidermis (skin) that is thin and as crisp as a potato chip!
Here is what you need:
Spice Rub
Pork belly 1.5 – 2kg (Fresh pork is best)
Salt 2 Tbsp
White pepper 1 Tbsp
Five spice powder 2 tsp
Ground ginger powder 2 Tbsp
MSG 2 tsp or substitute with 2 Tbsp Nam Yu (fermented bean curd)
Note: Sand ginger powder, 沙姜粉, sha-jiang-fen is excellent for sio bak. You can get it at some medicinal shops or at Victoria Wholesale centre. Replace the 2 Tbsp of ground ginger powder with 1 Tbsp each of sand ginger powder and ground ginger powder.
For Brushing
Rice Vinegar 1 Tbsp

Here is the step-by-step method
Step 1:
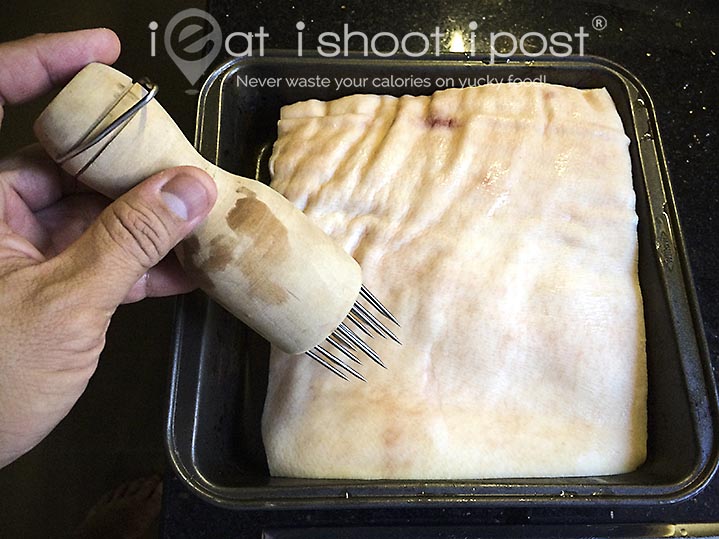
1. Stab pork all over to produce hundreds of tiny puncture holes in the skin. You can do this after the blanching step or before and after if you are kiasu (play safe) or if you just want to vent your anger. (It’s quite therapeutic).
Update: You only need to stab it after blanching. Blanching the skin first will make it easier to stab the pork. Make sure you stab it all the way into the meat. What you are trying to do is to make a hole past the epidermal layer (tough skin layer) so that any air bubbles that develops under the epidermis will escape during the cooking process. If you don’t do it properly, the bubbles will lift the epidermis off the fat layer and your crackling will not be even.
Step 2:

2. Prepare a water bath with a rack with the water level just half a cm higher than the rack
Step 3:
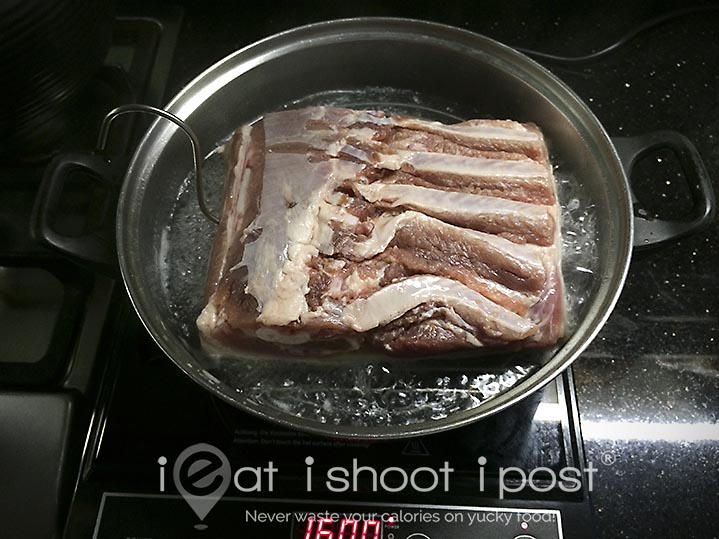
3. Place the pork belly skin side down and cook for 3 mins.
Step 4:
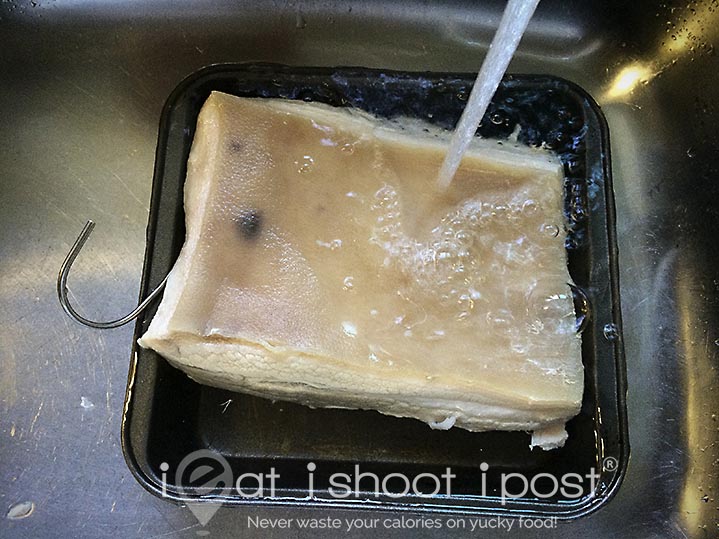
4. Thoroughly cool the pork belly under running water
Step 5:
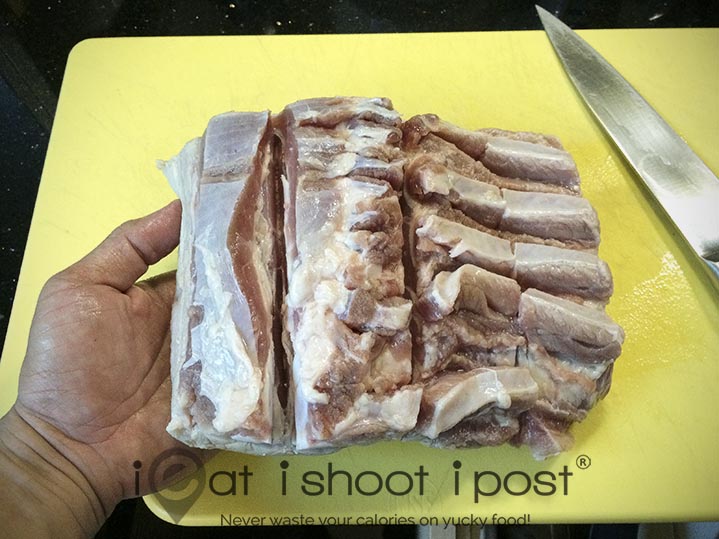
5. Make slit across the bottom-est layer of the pork belly. Cut across the grain so that the pork will not curl up when it is roasting. It also helps the spice rub to penetrate the meat.
Step 6:
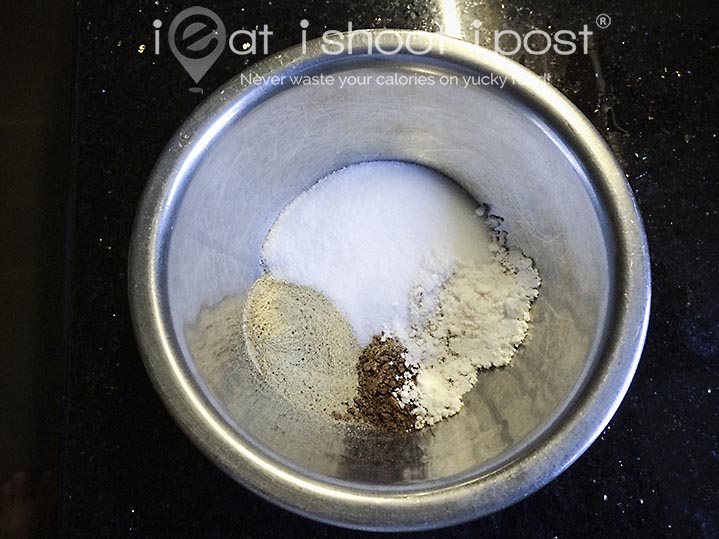
6. Mix the spice rub
Step 7:
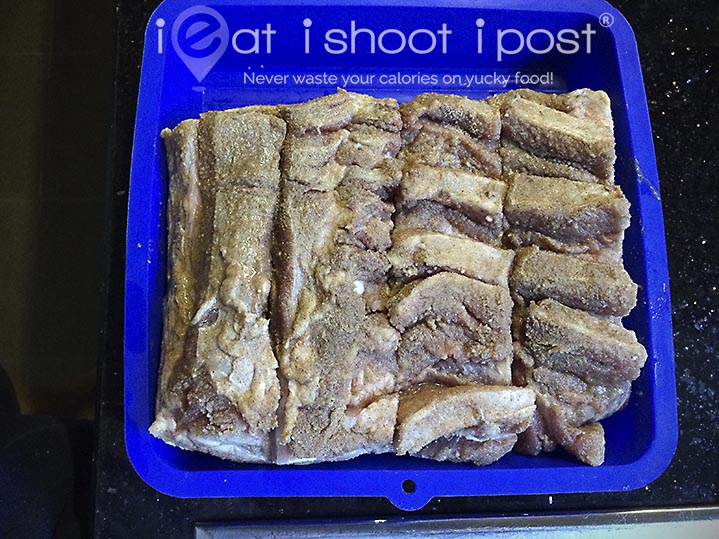
7. Apply the spice rub all over the meat (not the skin)
Step 8:
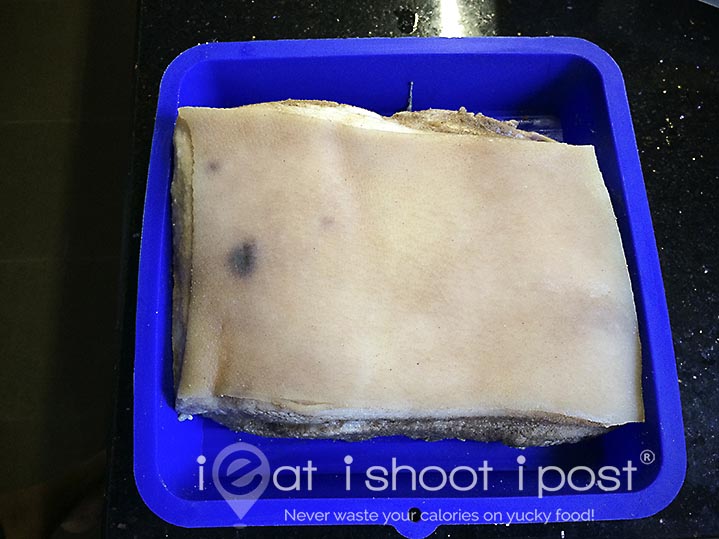
8. Leave to cure over night in the fridge. Cover loosely with baking paper so that air can circulate and dry the skin.
Update: Sprinkle 1 Tbsp Salt and 1 Tbsp baking soda (bicarbonate of soda) on the skin and spread it evenly before placing in the fridge
Step 9:

9. After curing overnight, use a paper towel to brush off the excess salt. Then insert two skewers crosswise through the meat. This will prevent it from curling during the roasting process.
Update: July 2019
Instead of brusing off the salt and baking soda, brush some white vinegar on top of the skin. This will neutralise the baking soda.
Step 10:

10. Roast at 180°C for 1 hour 10 mins or until the meat is cooked through.
Update: I now use a Miele Steam Combi oven to roast the sio bak. I set the oven to 150°C, 80% humidity for 45mins followed by 180°C, 20% humidity for 45mins. This results in a very juicy and tender sio bak! In a conventional oven, use the same temperature settings but start with 1 cm of water in the tray under the rack. Remove the water after the first 45mins (if it hasn’t already evaporated) and turn the oven up to 180°C for another 45mins.
Step 11:
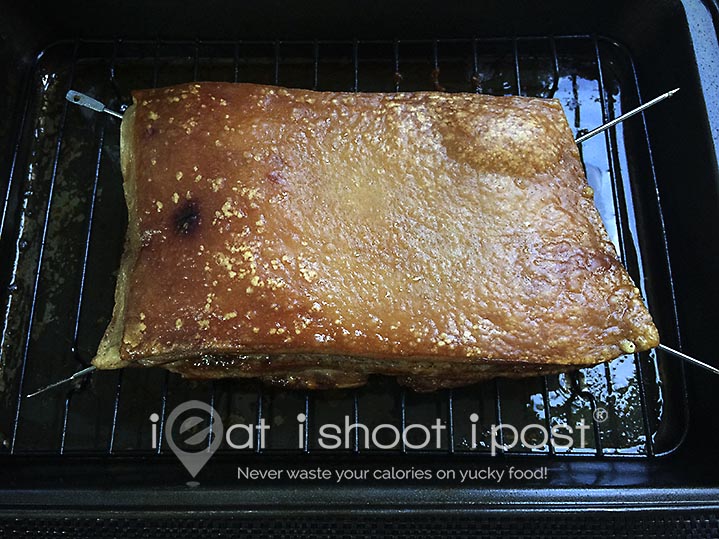
11. Remove the pork from the oven and switch the oven to grill mode at 250°C. Once the grill is ready, grill the pork on the upper shelf of the oven till the whole of the surface of the skin has bubbled and there are areas of char. This should take around 5 mins.
Step 12:

12. Remove from the oven and allow to cool for 10 mins. Lower the temperature of the grill to 200°C.
Step 13:
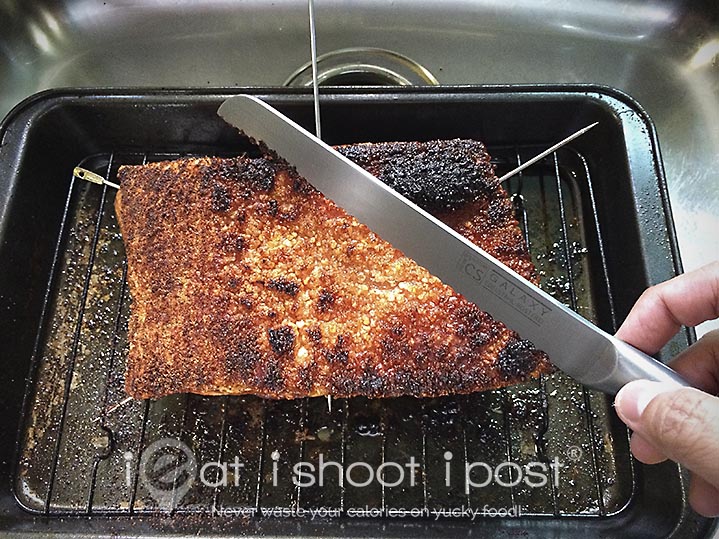
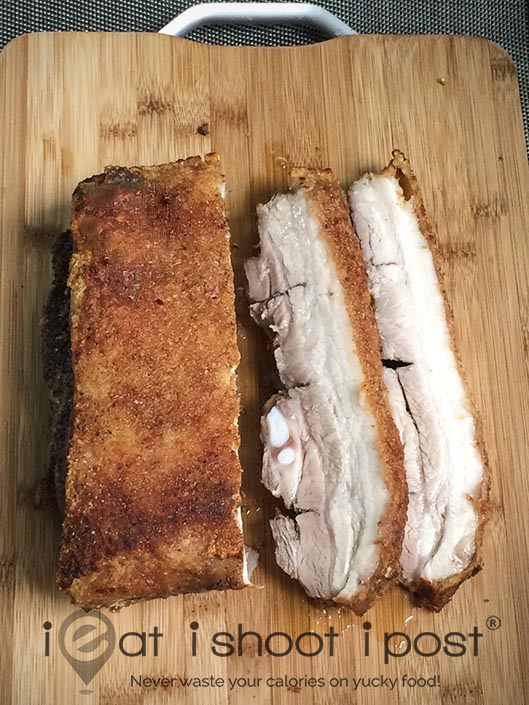
13. Using a serrated knife, scrape of the top layer of the rind.
Step 14:
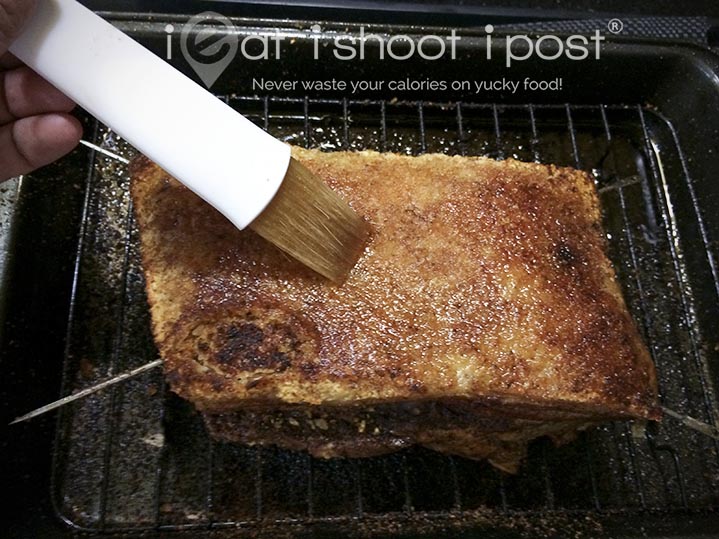
14. Brush on some cooking oil and return to the oven and grill at 200°C until the rind is golden brown.
Step 15:
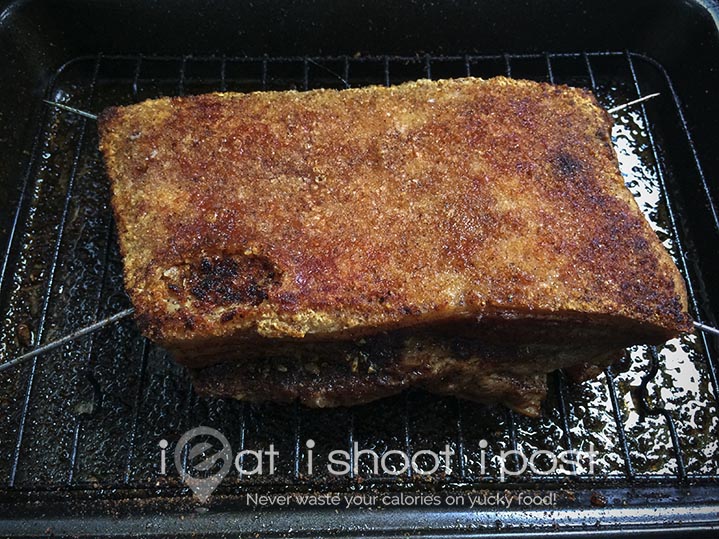
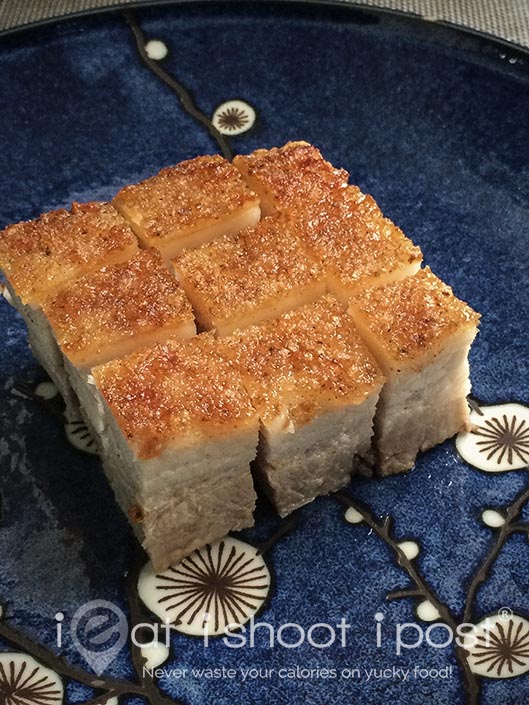
15. Allow to cool before chopping into 1.5cm chunks of crispy, juicy goodness. Enjoy!
Update 1 Oct 2015
The spice mix has been updated!
Update 6 May 2018
Made updates to several steps in the cooking process and added the video below:
Update 30 Jul 2019
Now I use baking soda and salt on the skin during the marinating stage
Acknowledgement
Thanks to personal Chef Benson Tong for his help with this recipe
Post Revisions
Recipe Video added on 16 Jul 2020
Photos updated 1 Jul 2020
Revised again July 2018
Revised and reposted on May 2018
Original post published on Jun 12, 2015
Other similar Hawker Food Recipes:
Char Siu
Har Cheong Gai
Roast Chicken
Places to eat Sio Bak:
88 Hong Kong Roast
Foong Kee Wanton Mee
Yee Kee Specialist Roasted Duck
Check out our CNY recipes:
18 CNY Recipes to usher in the New Year
Disclosure: Some links above are affiliate links, meaning, at no additional cost to you, a small commission is earned if you click through and make a purchase.


I tried another recipe yesterday which involves wrapping the meat with aluminum foil, top with coarse salt to cover the skin, bake for 1h 30min, then the salt crust is removed and the skin is broiled until crispy. No scrapping is needed and the crust is super crispy too!
Where can I buy that tool to puncture the skin?
Thank you.
Sia Huat at Temple St
My late sister bought me the same tool but it now old n dull. Is there a way I can sharpen it?
Err… I don’t know how.
I want to do this in a BBQ. I’m thinking I can pre-cook this the night before, and broil the skin on the grill. Should I apply the white vinegar just before I grill it? I have seen some youtube channels apply it at the first roasting of the pork. Thanks 🙂
Have you tried using the J.Kenji Lopez-Alt, salt and baking soda mixture on the skin? I think it could really increase the crispiness than salt alone.
No need. I am already very happy with this crackling. I did try baking soda before I read his article.
Thanks for the great recipe. This is the only one I tried so far that really works. Btw, oit of curiosity may I ask why the blanching step is necessary? Many recipes so not have this step but it obviously works so I am curious about what it does.
Blanching softens the skin and makes it easier to poke holes in it.
Can I used rock salt or sea salt? Amount same? Also I using conventsional oven, need to on the fan circulation function n rack which level? Thanks
Rock salt and sea salt is fine. Just use fan circulation and place the rack in the middle level of the oven.
Thanks
Do I blanch n stab or blanch than cool with running water than stab?
Blanch and let it cool before stabbing. You can stab without cooling too, but it is a bit difficult to handle.
Used this recipe over chinese new year and it was really good! So much easier to stab after blanching the skin (compared to trying to do it when uncooked!). Now I have to make a bunch for people – will it affect cook time / taste if I slice into smaller pieces before baking? Am thinking then I won’t need the skewers?
Not advisable. Just stick to the recipe. The best bits are in the middle. The sides are uneven, so best to make a whole slab, then cut into smaller portions.
Thanks so much for taking the time to reply, and so quickly! I’ll chop after cooking then… looking forward to seeing the new batch!
All the best!
Instead of oven, should try and use a broiler which will consistently gives u a bubbly crackling without charring.
Thanks for your suggestion!
Is the only use of vinegar in this recipe to remove the baking soda after the curing? I seem to remember an older version of the recipe that said to apply the vinegar onto the skin after cutting the pork against the grain.
Yes. I updated the method as I feel it is more effective.
I realised your sio bak skin is really thin and crispy after roasting. How do we get the skin to be thin as well as crispy? I have tried multiple times, achieving crunchy skin that is really thick.
Yes, it is in the scraping of the burnt surface of the rind. That is the secret.
Super recipe! Have gotten good reviews from those who have tasted it. However I used frozen pork belly instead. The baking time seems to work better. When I tried it on fresh pork belly, it seems to need longer cook time. Does cook time differ according to amount of fat in the piece of meat?
Glad you like the recipe! The cooking time will differ according to how thick the pork belly is!
I am making this for New years eve 2020. If I am doing 1kg pork belly is the roasting time the same or lesser? Btw, can I add some Shaoxing wine to ure marinade? Also may i ask why roast the pork belly at 150c then 180c instead of just 150C but perhaps longer like 2 hrs? Hope u can answer my questions soon. Will greatly appreciate ure advice and tips.
Hi Dr Tay, can I check what is the purpose of spreading the baking soda + salt on skin during marination, and how is it different from just spreading salt? I just tried your recipe over the weekend and it gave me the crispiest sio bak skin ever! However, the skin was quite salty compared to other recipes I’ve tried, and I am looking for ways to cut down on the salt. Thanks!
Hi YJ, yes the baking soda helps to crisp the skin. You can reduce the amount of salt on the skin. Main thing is to scrape the top layer off after charring the top layer.
Thank you 🙂
Thanks for the receipe! It’s quite a success but I think it’s a tad too salty and spicy for me. I would reduce the salt and pepper next try.
If I remove the salt and bicarbonate soda on the skin is will it make the skin less crispy?
Yes
Sure. Recipes are just there to give you the foundation. You should adjust it according to your own liking!
Hi Dr Leslie, I will be trying this receipe later ! but i realised i bought 1KG of pork belly instead. will the cooking time be different ?
Just use the same roasting time.
Can I use lemon juice instead of vinegar to neutralise the sodium bicarbonate?
The skin was inedible as it was way too salty even though I’ve reduced the listed quantity and the addition of Baking soda had this awful after taste. The method of baking was really good though as it yielded juicy and delicious meat. Next time I will follow the baking temps etc and just add reduced salt to the skin NOT baking soda/vinegar
Did you charr the skin and scrape it off?
I did char parts of the skin and scraped it off but I must admit not the whole area was charred. Is that scrapping to remove the bicarb layer? Thanks for your reply 😊
Yes, that is the whole trick in order to get that ultra crispy crackling!