 I have many people writing to me asking for tips on how to take better food pictures and the kind of camera equipment I use. And I also know of some kakis who are thinking about starting their own food blogs but wanting to get some advise on what camera to get. So I thought I would I would share some simple tips on how to make your food photos look more droolsome.
The first thing you need is a good camera. I use a digital SLR (Single Lens Reflex) to take most of my pictures but some people might find a DSLR a little intimidating and too cumbersome lug around. So if you are just starting out, you would probably want to buy something that is affordable, handy and takes reasonably good pictures.

Photo taken with the Canon Powershot A590IS
Now let me share with you the One Golden Rule that will instantly make your photos look 100% better:
As far as you can help it – Never take pictures with direct flash!
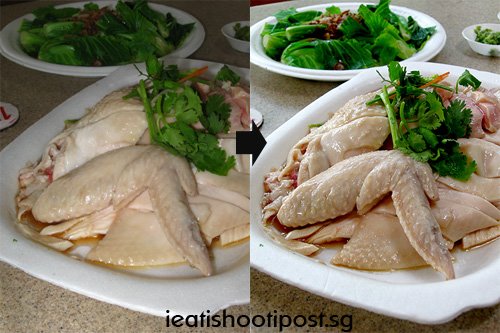
The reason is very simple. God never created us with a torchlight on our foreheads! So when you take pictures with a flash coming directly from your camera, the photo will look very stark and unnatural. The big difference between the chicken rice photo on the left and the one on the right is that the one on the left is taken with direct flash. So just by turning off the flash, I managed to take a much nicer chicken rice picture on the right.
What that means is that you need a camera that has some manual functions. If you are used to using your camera phone or a slim point-and-shoot camera, then it also means you’ll have to learn a few simple tricks.
Photography is all about capturing light onto your “film”. Nowadays with digital cameras, the film is replaced by a sensor which essentially turns light into digital signals to be stored onto the memory card. The main problem with photography is to get the right amount of light to fall onto your film. Most of the time, the problem arises when there is not enough light, so the most simple way to get a around it is to use a flash to illuminate the subject. That is what most automatic point-and-shoot cameras do. But by doing that you end up with stark looking pictures.
If you simply turn off the flash on your camera, your pictures will come out too dark unless you are able to tweak some of the settings on your camera. In order to be able to take pictures in low light conditions there are essentially three things you can do:
1. Open up the aperture to allow more light in
2. Keep the shutter opened longer so that more light comes in
3. Change the sensitivity of the “film”
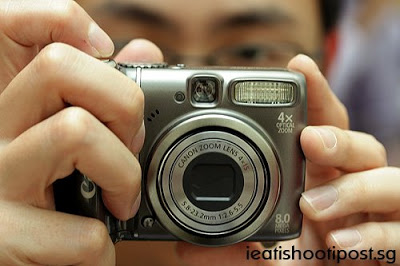
Now I want to keep things simple so I won’t go into all the technical details and make you miss your lunch. Essentially, you want a camera where you are able to manipulate some settings. One range you might want to consider is the Canon Powershot series which combines the portability of a point-and-shoot camera with manual functions that are found in a DSLR. I chose the Canon Powershot A590IS because it is one of the smallest and most affordable in the range which still provides all the functions I needed to take a reasonably good picture. Sometimes I too feel a little lazy to lug around my DSLR so this little camera comes in handy.
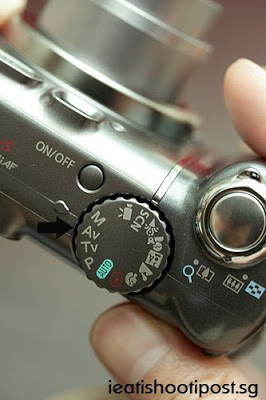
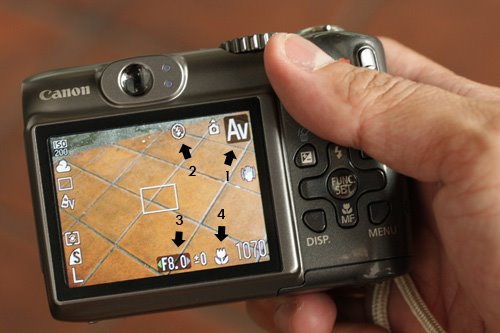
Don’t be intimidated by the manual functions. What you really want to do is to shoot your photos on Aperture Priority (Av – See pic above). That simply means that you determine how big the aperture is going to be (size of hole for light to come in) and the camera will do the rest for you.
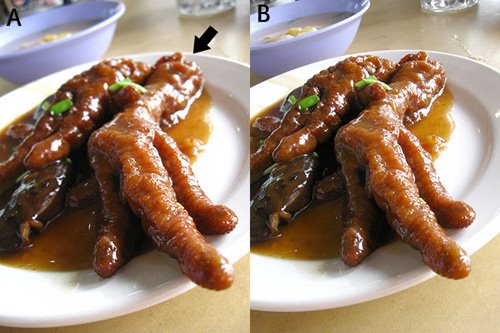
Photo taken with the Canon Powershot A590IS
Now a few technical things you need to know.
The aperture size is measured in terms of F-stops. All you need to know is that a small F/stop number eg F2.8 means a big aperture and conversly a large number eg F8 means a small aperture.
When you shoot a picture at F2.8 (ie big aperture) two things happen:
1. You will let in more light so you can shoot without the flash
2. The background will become blurred. (This is good)
Picture A was shot at F2.6 while B was shot with F8. You can see that the background (Arrow) is a little blurred. This is good because it creates a sense of depth and your eyes are naturally drawn to the part of the picture which is focussed. (You want this part of the picture to be the yummiest bit!). Now the thing with most compact cameras is that they use very small sensors. That usually mean that everything appears sharp and that is not good. If you are not convinced that it better to have the blur, than just focus on your computer screen for a moment and tell me if the stuff surrounding the screen is sharp or blurred? So basically, you want to capture on film what your eye naturally sees. Here’s another example of this effect which is known as “Depth of Field” which is the distance between where the sharpness begins and ends.

Photo taken with the Canon Powershot A590IS
This picture was taken using Aperture Priority (Av) mode at F2.6. Notice how the M is clear and the how the letters closer to us and further away from the M progressively becomes blurred?
With the Canon Powershot 590IS, I find that setting the Av to F2.6 works well with most of my food shots. There are four simple things to do before taking your shot:
1. Set to Av mode
2. Turn off flash
3. Adjust the aperture to F2.6
4. Turn on Macro mode.
The special Macro function allows you to take close up shots of the dishes which is really what you are doing most of the time with food pics. Using just these four steps, we can achieve a much better result then shooting in auto mode as shown below:
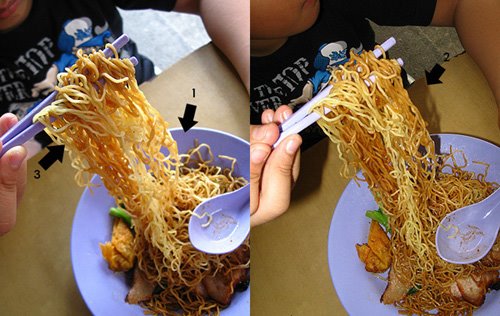
Photo taken with the Canon Powershot A590IS
The picture on the left is taken with the four steps outlined above. The one on the right was taken with auto function. Notice how the noodles are sharp where the chopsticks are and becomes progressively blurred towards the plate(1). Your attention is thus drawn to the area in focus which is the noodles on the chopsticks. This is exactly what we want cos that’s the part you are just about to put into your mouth. Notice that with direct flash you get harsh shadows (2) which really spoils an otherwise good picture. Instead the soft shadows should be in area (3) where they occur naturally, giving a sense of depth.
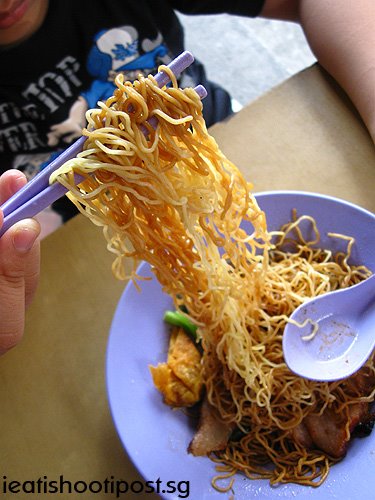
Photo taken with the Canon Powershot A590IS
Here’s the picture enlarged so that you can look at the details. I like the way the noodles sort of pop out of the picture and at the same time you can still make out a slightly blurred plate of noodles in the background. So you know this is a bowl of wanton mee but mind is focussed on the luscious noodles on the chopsticks just seconds away from your mouth. I can just feel the texture of the noodles in my mouth right now!
The Powershot A590IS fits well into the palm of your hands but is of course a little bulkier than the slim point-and-shoot cameras. The bigger size makes for better ergonomics and handling is easier if you have big hands. The camera runs on normal AA sized batteries which saves you the hassle of having to bring around a battery charger which is a real advantage when you are traveling. The other really useful feature is the Image Stabilization technology which helps to reduce camera shake when shooting in low light conditions.
The camera is not without its weaknesses. I found that the images are very grainy at ISO 1600, so your images in really low light conditions are not that great. Battery life doesn’t seem to last all that long and I have already had to change 2 sets of batteries after a week of shooting.
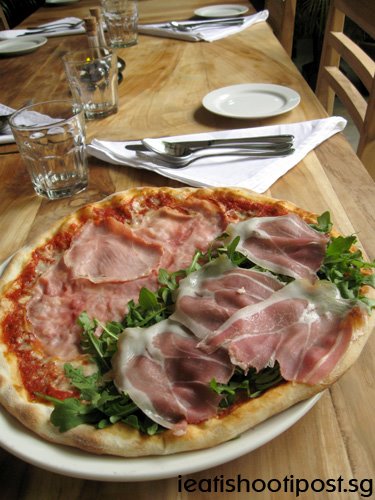
Photo taken with the Canon Powershot A590IS
Summary
The first golden rule for taking better food pics is to take your photos without the built-in flash. In low light conditions, this can be achieved by manipulating some of the functions of the camera. If you are really keen on taking better food pics, then you will need a camera with manual controls which will allow you to take pictures using Aperture Priority (Av) mode and be able to adjust other settings like the ISO, Macro function and the option to turn off the flash.
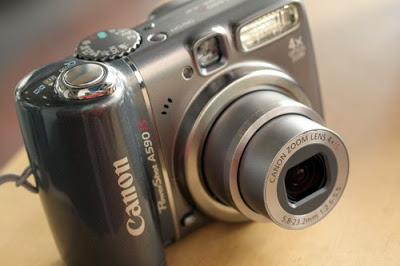
Canon PowerShot A590IS retail price $369
Overall, I am quite happy with my Canon PowerShot A590IS. It’s a handy little camera that allows me to take nice food pics as well as pictures of my family which I would otherwise miss out on when I don’t have my DSLR with me. For $369, it is even cheaper than a lot of slim point-and-shoot cameras but is packed with many of the manual controls that are found on my DSLR. So if you are looking for an entry level Food Blogging camera, you might want to pop down to your nearest camera shop and check out the Canon PowerShot A590IS.
More info and specs on the PowerShot A590IS can be found here
This Post was Sponsored by Canon


